没有合适的资源?快使用搜索试试~ 我知道了~
温馨提示
试读
13页
Shap-E是OpenAI开发的一种创新模型,它可以使用文本或图像作为输入来生成一系列3D对象,从而改变了3D应用领域。这项非凡的技术可以在GitHub上免费访问,用户可以在自己的计算机上无缝运行它,不需要OpenAI API密钥或互联网连接。Shap-E的多功能性也是其与众不同之处,用户可以将生成的3D对象在Microsoft Paint 3D等软件中打开,甚至可以转换成STL文件进行3D打印。这项技术正在重新定义我们处理文本到3D和图像到3D生成的方式,以及人工智能应用程序可以从中产生哪些创造性的可能性。
资源推荐
资源详情
资源评论
Shap-E 是 OpenAI 开发的一种创新模型,它可以使用文本或图像作为输入来生
成一系列 3D 对象,从而改变了 3D 应用领域。这项非凡的技术可以在 GitHub
上免费访问,用户可以在自己的计算机上无缝运行它,不需要 OpenAI API 密钥
或互联网连接。Shap-E 的多功能性也是其与众不同之处,用户可以将生成的 3D
对象在 Microsoft Paint 3D 等软件中打开,甚至可以转换成 STL 文件进行 3D 打
印。这项技术正在重新定义我们处理文本到 3D 和图像到 3D 生成的方式,以及
人工智能应用程序可以从中产生哪些创造性的可能性。
在本教程中,我们将学习如何在 Google Colab 中创建笔记本,设置和使用
OpenAI 的 Shap-E 模型生成 3D 模型,并使用 Blender Studio 对其进行自定义。
首先,您需要前往 blender.org 并下载与您的操作系统兼容的 Blender Studio。
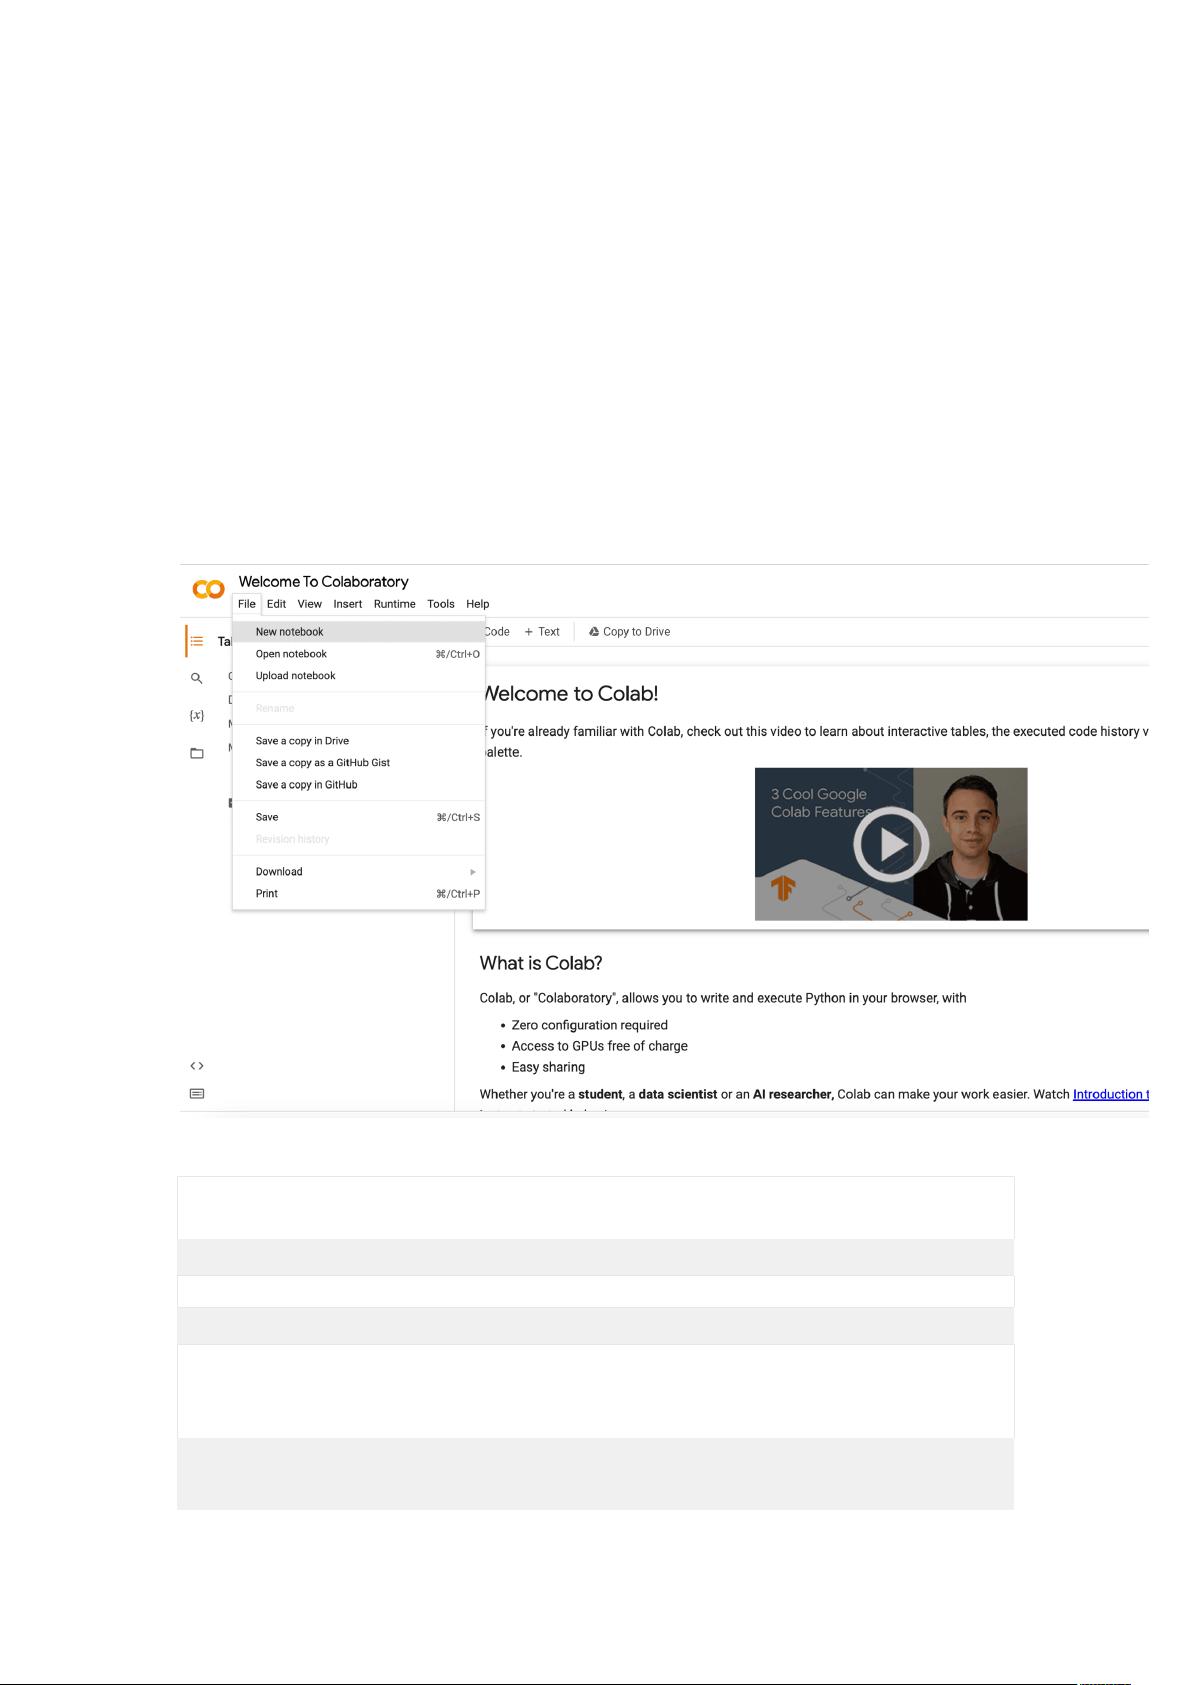
接 下 来 , 转 到 Google Colab 并 创 建 一 个 新 的 笔 记 本 。
在 Google Colab 中创建新笔记本
现在,我们需要将 Shap-E 存储库克隆到我们的 Google Colab Notebook。
!git clone https://github.com/openai/shap-e
进入目录并安装要求。
%cd shap-e!pip install -e .
添加新的 code cell.
在这里,我们将导入所有必要的库。
import torchfrom shap_e.diffusion.sample import sample_latentsfrom shap_e.diffusion
.gaussian_diffusion import diffusion_from_configfrom shap_e.models.download import
load_model, load_configfrom shap_e.util.notebooks import create_pan_cameras, decode
_latent_images, gif_widget
请点击“Run”按钮或按下“CMD/CTRL + Enter”键来运行单个代码块。
现在,我们将设置设备为 CUDA(如果可用),否则设置为 CPU。
device = torch.device('cuda' if torch.cuda.is_available() else 'cpu')
单击 Run 或 CMD/CTRL + Enter。
添加新的 code cell.
在这里,我们将加载模型和权重。
xm = load_model('transmitter', device=device) model = load_model('text300M', device
=device) diffusion = diffusion_from_config(load_config('diffusion'))
请点击“Run”或按下“CMD/CTRL + Enter”键。
请耐心等待,加载模型和权重需要一些时间。对我来说,这大约花费了 5 分钟的
时间。但是,这取决于您的互联网连接速度。
接下来,我们将生成一个 3D 模型。
batch_size = 1 # this is the size of the models, higher values take longer to gener
ate.guidance_scale = 15.0 # this is the scale of the guidance, higher values make t
he model look more like the prompt.prompt = "a donut" # this is the prompt, you can
change this to anything you want.latents = sample_latents(
batch_size=batch_size,
model=model,
diffusion=diffusion,
guidance_scale=guidance_scale,
model_kwargs=dict(texts=[prompt] * batch_size),
progress=True,
clip_denoised=True,
use_fp16=True,
use_karras=True,
karras_steps=64,
sigma_min=1E-3,
sigma_max=160,
s_churn=0,)
单击 Run 或 CMD/CTRL + Enter。
生成 3D 模型需要一些时间,根据您的 batch_size 更高 batch_size 将需要更
长的时间来生成 3D 模型。对我来说,生成 3D 模型大约需要 22 秒
batch_size=1。
添加新的 code cell.
这里我们将渲染 3D 模型,使用 render_mode = 'nerf' Neural Radiance
Fields (NeRF)来渲染 3D 模型。您可以将其更改为使用样式传递函数
(STF)render_mode = 'stf'渲染模式渲染 3D 模型。
render_mode = 'nerf' # you can change this to 'stf'size = 64 # this is the size of
the renders, higher values take longer to render.cameras = create_pan_cameras(size,
device)for i, latent in enumerate(latents):
images = decode_latent_images(xm, latent, cameras, rendering_mode=render_mode)
display(gif_widget(images))
请点击“Run”或按下“CMD/CTRL + Enter”键。
你看到模型旋转了吗?很酷,是吗?
接下来,我们将把 3D 模型保存为.ply 和.obj 文件。
请注意:.obj 文件将在稍后在 Blender Studio 中用于自定义。
# Example of saving the latents as meshes.from shap_e.util.notebooks import decode_
latent_meshfor i, latent in enumerate(latents):
t = decode_latent_mesh(xm, latent).tri_mesh()
with open(f'example_mesh_{i}.ply', 'wb') as f: # this is three-
dimensional geometric data of model.
t.write_ply(f)
剩余12页未读,继续阅读
资源评论
geeks老师
- 粉丝: 131
- 资源: 50
上传资源 快速赚钱
- 我的内容管理 展开
- 我的资源 快来上传第一个资源
- 我的收益 登录查看自己的收益
- 我的积分 登录查看自己的积分
- 我的C币 登录后查看C币余额
- 我的收藏
- 我的下载
- 下载帮助
安全验证
文档复制为VIP权益,开通VIP直接复制
信息提交成功