# Air_Cursor
基于mediapipe的手势识别光标
# ——环境搭建
依赖表:
依赖名称 | 版本
-|-
Python | 3.8.13
mediapipe | 0.8.9
autopy | 4.0.0
opencv-python | 4.5.5.64
pywin32 | 225
PyAutoGUI | 0.9.53
建议使用 anaconda 安装搭建虚拟环境运行本项目,本说明仅提供使用 anaconda 搭建环境
的教程,强烈建议按照下述步骤进行安装。如果不想使用 anaconda,可以参考上面的依赖
表自行搭建环境。
# 步骤一:安装 anaconda
1 解压/完整项目以及使用说明/在 anaconda 官网下载安装程序
2 双击按照弹窗提示安装 Anaconda3-2021.11-Windows-x86_64.exe
# 步骤二:安装空气光标(Air Cursor)的环境依赖
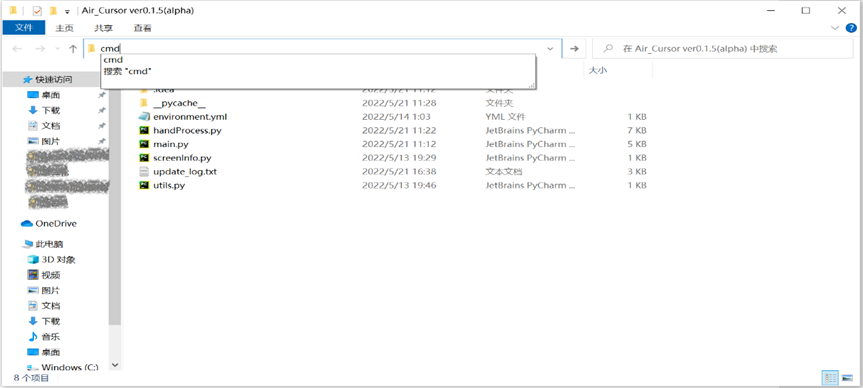
1 解压/Air_Cursor ver0.1.5(alpha)/并放置于英文路径下

2 打开命令提示符 cmd,建议直接在路径栏输入 cmd,如图所示

3 输入 conda env create -f environment.yml 回车,完成后如图所示
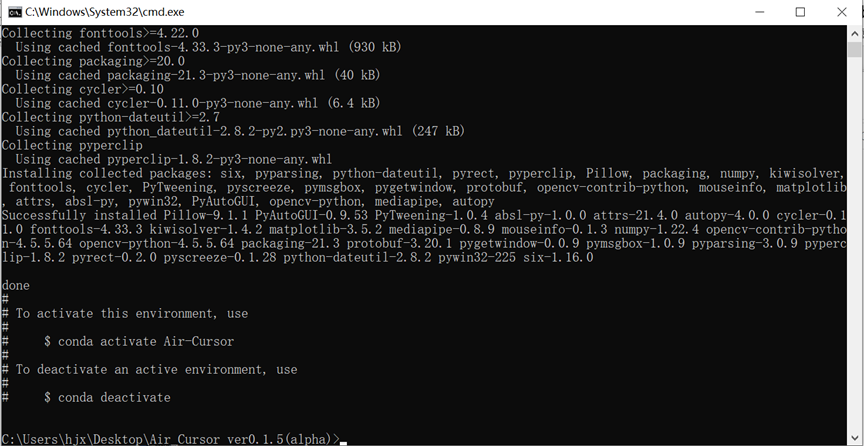
4 输入 conda info –-envs,出现环境 Air-Cursor,代表安装成功。

# ——使用空气光标(Air Cursor)
1在路径栏输入cmd,如图所示。
2输入conda activate Air-Cursor,如图所示。

3输入python main.py,出现INFO: Created TensorFlow Lite XNNPACK delegate for CPU.表示成功运行。

操作实例(伸出五指为退出):


基于mediapipe的手势识别光标.zip

版权申诉
109 浏览量
2024-04-04
12:48:29
上传
评论
收藏 11KB ZIP 举报
 基于mediapipe的手势识别光标.zip (10个子文件)
  open_weishoushishibie
  utils.py 811B main.py 4KB
 update_log.txt 3KB screenInfo.py 448B environment.yml 197B handProcess.py 7KB __pycache__ handProcess.cpython-38.pyc 5KB utils.cpython-38.pyc 1KB screenInfo.cpython-38.pyc 831B README.md 2KB
资源评论


极致人生-010
- 粉丝: 3259
- 资源: 3077


