没有合适的资源?快使用搜索试试~ 我知道了~
风光摄影PS后期亮度蒙版
资源推荐
资源详情
资源评论
第 1 页 共 28 页
风光摄影PS后期高级教程:亮度蒙版
(译自Tony Kuyper Luminosity Masks)
译者:陈晟尧
前言:
现在的国内的摄影爱好者以及部分“资深”摄影师(当然基本都是老头)都对PS后期处理照片持极端的看法。有人过度追求PS的创造效果,本末倒置,其
代表为HDR的泛滥使用。诚然,HDR能够解决图片的动态范围问题,但过于虚假的表现力和夸张的色彩依然使其偏离摄影本质,跟何况HDR如今已经成为了后期
快餐,“只要HDR就是好图”的概念成为了定式。还有人对于PS后期嗤之以鼻,他们都是保守派,有可能都是玩胶片出身。他们的观点是:摄影是纯粹的,任
何后期手段都是画蛇添足,很假。但他们殊不知胶片时代的暗房技术也在左右着图片的好坏。
因此,任何一种极端的观点都是片面的。后期,或者更具象地说:PS,是还原现场体验的重要手段,是弥补相机成像缺陷的重要手段,可以说,好的PS是
在弥补照片的缺陷,不会使图像看起来很假,也不是给照片做加法。在我看来,数码时代,一张好的照片,前期占6分,后期占4分。前期再好,也只是及格;
后期再好,也不一定能及格。
有了这样的观念铺垫来看PS,我们就能分辨什么是好的后期,什么是不好的。换句话说,好的后期是不会留下过重的痕迹的。而对于后期本身,唯一的目
的就是还原现场,附加的目的才是讨喜的颜色和风格。
就如今的数码相机技术来看,宽容度成为了是之与视觉所不同的最大难题。在光比过大的环境之下,我们所拍摄的照片往往不尽如人意,其关键原因在与
相机宽容度与视觉比起来太低了,不符合我们的视觉习惯。为了解决这样的问题,胶片时代就有了使用渐变灰镜来压低天空曝光,保持画面曝光平衡的做法。
而渐变灰镜的价格不菲,如果要购买一片没有偏色的灰镜,价格动辄上千,更何况是多片?同时在镜头之前附加渐变灰镜也会引起画质下降。可幸的是,我们
身处数码时代,后期PS成为了我们廉价、优秀的选择。运用PS来解决宽容度问题,优势很大:
1、避免损害画质
2、可以对任意细节进行局部调整,避免了GND的山体压暗老大难问题
3、廉价,预算瞬间少了几千
而它的最大缺点,也只是对于后期PS技术有着很高的要求。
PS后期曝光对于前期拍摄有一定的前提,就是要包围曝光——
再各种曝光值下拍摄相同的照片,期间不能有任何抖动,要保证各照片的构图完全相同。由于是后期技术的探讨,我就不多提及前期拍摄的部分了。
我从国外网站上翻译了这篇教程——亮度蒙版。这是Tony
Kuyper系列教程中的一部分,也是一切的基础。它能够更自然地处理曝光合成,使得画面更加柔和,接近视觉。学习教程的前提是你要有一定的PS和摄影基础
,要理解Raw图像的特点,然后,不断尝试。
Luminosity Masks
亮度蒙版
Tony Kuyper 2006
引言
note:最近我做了一个
【PS的自定义面板】,能够更简单地实现创建和使用亮度蒙版,还有网站上的其他后期技巧。访问这个
链接
来了解面板的更多信息,同时了解工作原理。
亮度蒙版是影调调整的基石。它提供了一个简便的方案,即选取某图像的个特定的影调,在合适的条件下,对它进行单独调整。这个方法可以解决相机感
光元件或胶片所拍摄的图像的宽容度局限,还可以纠正在图像转换当中的偏移影调。除了简化这些基本的画面调整之外,亮度蒙版也在以一种独特的角度来阐
释光线。亮度蒙版使捕捉到的光线更加灵活多变,从而提供给摄影师更大的空间来使用Photoshop来进行个人风格的摄影创作。
我的每张照片都使用了亮度蒙版来制作,并且每张图常常使用多次。在过去几年里,我尝试了许多不同版本的蒙版,并且把他们变得越来越实用。虽然亮
度蒙版是PS里创建出来的,但你在下拉菜单或者是工具栏里是找不到他们的。在这个教程中,我将会阐述这些蒙版的概念,教你如何用PS来创建他们,以及展
示基本的使用技巧。其中,亮部和暗部作为两个基础蒙版,制作相对简单,但当许多影调混合的时候,就会随之变得复杂。在教程里,所有步骤都会解释清楚
。虽说理解如何去制作亮度蒙版和所选择的影调非常重要,但它确实相当繁琐。所以,要在PS的工作流程中高效地使用这些蒙版,最好能创建一些宏来简化他
的关键步骤。这些宏大大地简化了生成蒙版的步骤,省去了大量时间。在这个教程的最后一部分,我列出了我自己亮度蒙版的宏设置。不过我还是得敦促你花
一点时间来好好理解这些蒙版是怎么制作的,同时,请务必动手操作。学习这网站上的其他教程对你也会很有用,这会让你形成自己的一套实用蒙版的思路,
最后使你的照片独树一帜。
网站上的一些
其他教程
是影调调整概念的延伸,而亮度蒙版使得影调调整变成了可能。这第一个教程虽然只是在讲述一个基本的概念,但它所涵盖的内容
却蕴含着无限的可能性。而其他的教程将会注重于蒙版可以用到的其他方面以及探索影调调整的其他技巧。
深入学习之前,我想提一下,我用的是Windows版的Photoshop
CS。教学里的每一步指示所给的参数和一些数字都会是假定的。虽然每个步骤我都会解释清楚,但我不想让别人只是想着按部就班。如果你不懂PS,PS的参考
书也可以帮助你,包括“用户指导”还有帮助菜单。但如果你很熟悉PS的话,就可以很快上手。另外,我个人很倾向于尽可能地使用快捷键,这些快捷键是由
Shift、Ctrl和Alt同时按,或者同时按的时候再加按字母键、数字键的组合方式构成的。我所列举的快捷键会被编入默认键,因此如果你有自己的快捷键习惯,
请你相应调整或者重新编排快捷键。Mac用户需要知道PC上的“Ctrl”等同于“Command”,“Alt”等同于“Option”;还有些是下拉菜单命令里所对应的快
第 3 页 共 28 页
捷键,这些快捷键往往会比基本的键更复杂,所以我几乎不使用他们。我还很喜欢使用Windows经典的灰色作为我程序的背景色,因此截图可能会看起来比较
老气。
下图是一张我近期拍摄的砂岩,这张图使用了许多亮度蒙版的技巧,这些技巧都会在教程里面谈到。这张图里还用到了亮度笔刷(这是一个运用亮度蒙版
的更先进的方法,会在其他教程中谈到)还有饱和度蒙版。
Image created using luminosity masks, rollover=no masks
Introduction
NOTE: I recently developed a custom actions panel that makes creating and experimenting with luminosity masks, as well as the other techniques on this website, much
easier. Please visit this page for more information about the custom Photoshop panel and how it works.
Luminosity masks are the cornerstone of tone-based image adjustments. These masks provide a convenient way to select specific tones in an image which can then be
altered as the user sees fit. They have the ability to overcome shortcomings in the tonal values that were captured by the camera or film and to correct tones that shifted
during image manipulation. Beyond simplifying these standard adjustments, however, luminosity masks also encourage a very individual approach to interpreting light.
Luminosity masks make the captured light incredibly flexible and thereby provide the artist photographer unique opportunities to use Photoshop to explore their personal
vision through photography.
I use luminosity masks in every image I make, usually multiple times. Over the years I’ve created several different versions of the masks that have made them more useful.
While luminosity masks are created in Photoshop, they aren't available from the drop-down menus and can't be created with tools in Photoshop's Tools palette. This
tutorial will describe the masks, how to make them using Photoshop, and the basic way to use them. The two primary masks, "Lights" and "Darks", are relatively easy to
create. From there, however, it becomes more complex as the various selections are intersected and subtracted. All the steps will be explained in the tutorial. While it’s
important to understand the basics of how to create luminosity masks and the tones they select, mask creation can be a bit cumbersome. So, to efficiently use the masks
in a Photoshop workflow, it’s usually best to create a set of Photoshop actions to do all the key strokes. Actions greatly simplify the process of generating the masks; a
couple of clicks and you're done. I make my personal set of actions to create the luminosity masks available on the last page of the tutorial if you’d like to use them.
However, I would urge you to take the time to gain a good understanding of the process by which the masks are created and to actually practice making them. It will be
useful when reading the other tutorials on this website and will allow you to develop a very personal approach to employing the masks, which, in the end, will make your
images more distinctive.
Several of the other tutorials on this website are an extension of the concept of tone-based adjustments that the luminosity masks make possible. While this first tutorial
will provide the basic concepts, there is a wide range of possibilities beyond what it can cover. The other tutorials will look at additional ways that the masks can be used
as well as exploring other techniques for tonal adjustments. Please visit them when you have time. The "tutorials" link in the header of each page will take you to the
tutorial table of contents.
Before going too far, I should mention that I work on a Windows-based computer using Photoshop CS. The instructions in this tutorial will be given with those parameters
in mind. Some facility with Photoshop will be assumed. While the details of the processes will be explained, I won't attempt to provide definitions of every Photoshop
term or how to perform common steps. There are many reference guides to Photoshop that can help you, including the User Guide and the embedded "Help" menu in
Photoshop, but if you've worked (or played) with Photoshop, you're probably familiar enough with the program to do the necessary steps. Additionally, I prefer to use
Photoshop shortcut keys whenever possible. These are a combination of the Shift, Ctrl, and/or Alt keys being held down at the same time and, while continuing to hold
them down, hitting a letter, number, or symbol on the key board. The ones I list will be the defaults that come programmed into Photoshop. If you've altered your
shortcut keys to change the defaults, it's assumed you know what your corresponding shortcut is or can at least restore the defaults. Mac users will know that "Ctrl" on a
PC is the same as "Command" on a Mac and that "Alt" on a PC is the same as "Option" on a Mac. There are usually drop-down menu commands that correspond to the
shortcut keys, but these often become more complex than the shortcut keys, so I generally don't use them. I also like the classic Windows look to my programs with
neutral gray colors, so the screen captures might look a little old-fashioned.
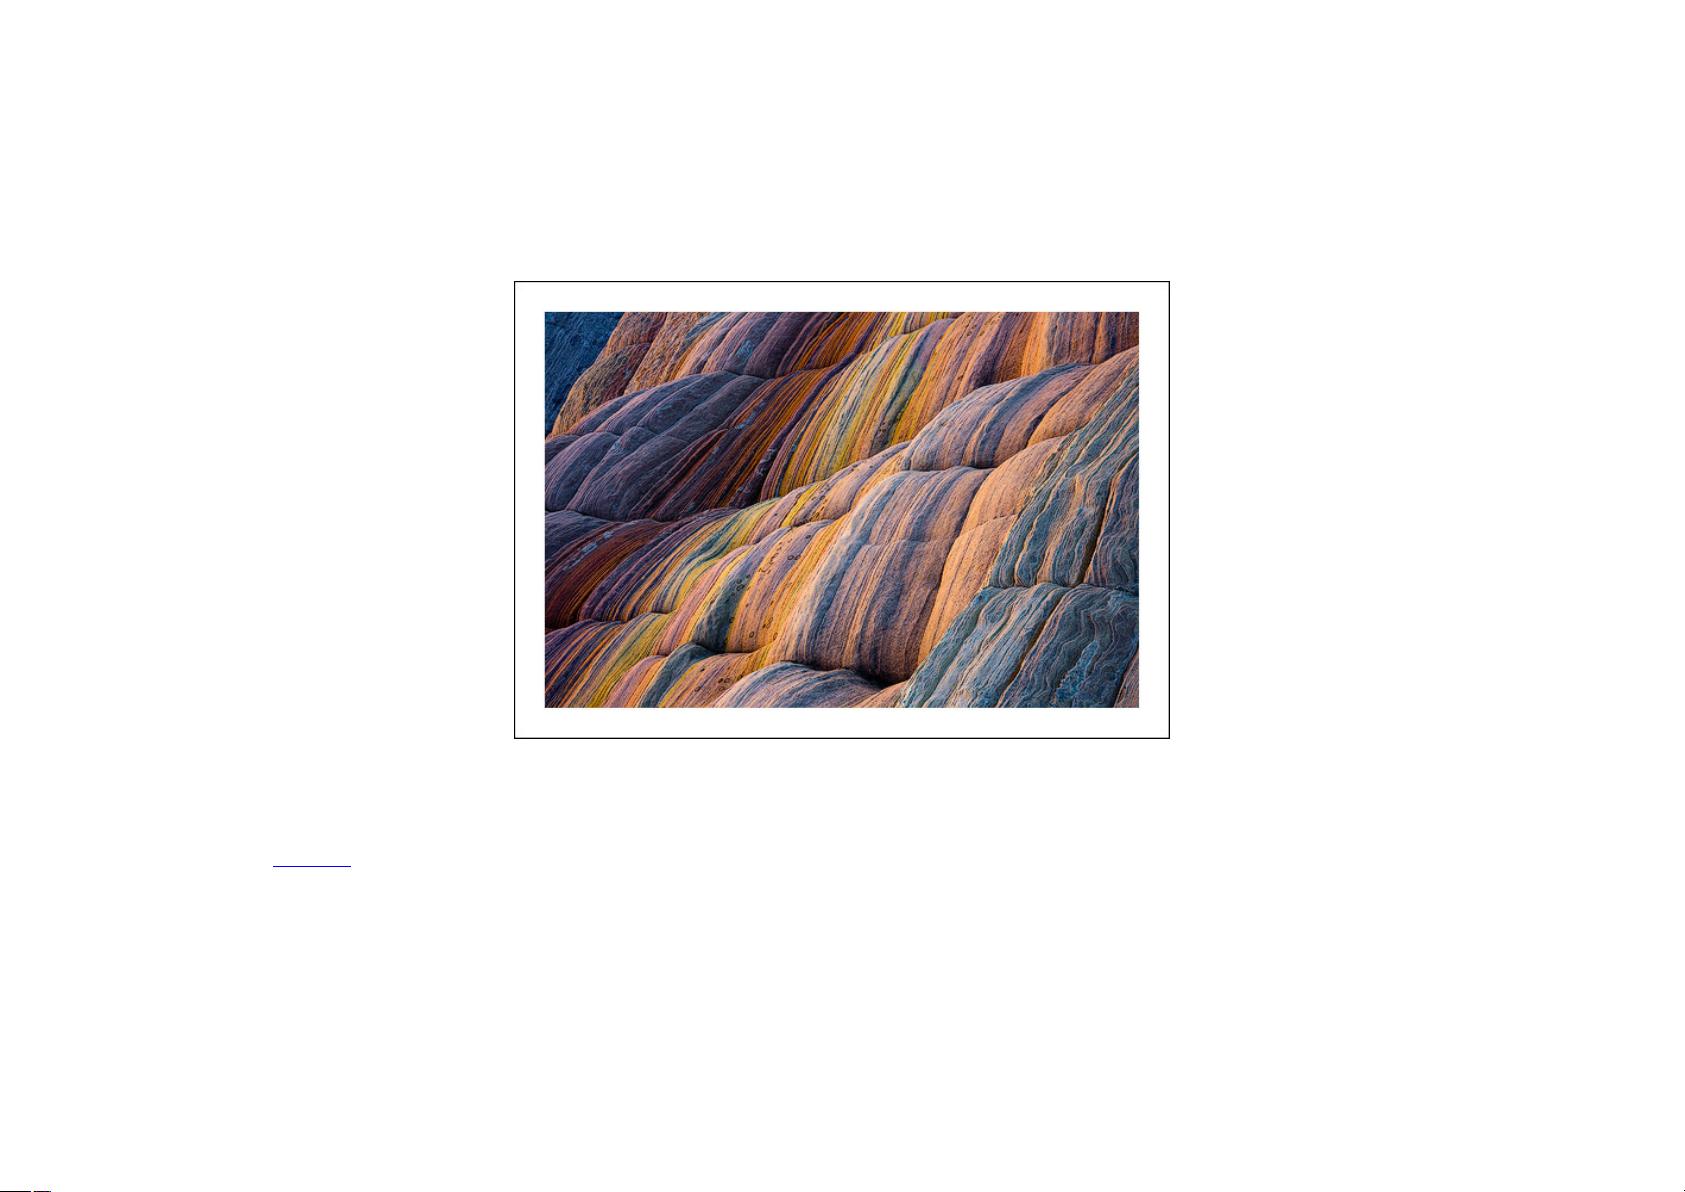
Below is a recent sandstone detail image that incorporates many of the luminosity masking techniques discussed in this tutorial. Luminosity painting (a more advanced
way of using luminosity masks and one discussed in another tutorial on this website) and saturation masking were also used to develop this image. Roll over the image to
see how it looks when the adjustment layers that use luminosity masks are turned off.
Section1:最基础的蒙版——亮部
亮度蒙版无非就是图像亮部上的选区。最基础的亮部蒙版,就是选取图像亮部成比例的像素。这里有三个不同的方法来制作亮部蒙版(图1)。我罗列了这三
个方法,但你只需选择一种来创建选区。
1.Alt+Ctrl+~。如果使用的是CS4以后版本,现在快捷键改为Alt+Ctrl+2。
2.按住Ctrl,然后鼠标点击RGB通道。
3.选择RGB通道,把它拖到通道底部的“作为选区载入”的图标上。
第 5 页 共 28 页
图1
然后选区附近的选区点就会出现(图2)。由于Photoshop只有在像素至少50%被选中的情况下会出现选区点,而选区又是基于图像的亮度的,所以选区点只会
在等同于50%灰或更亮的灰度的像素下才会出现。我之后会讲到这种情况的更多细节,现在只需要知道这些选区点所组成的选区很接近图像的亮部。
剩余27页未读,继续阅读
资源评论
plex8888
- 粉丝: 0
- 资源: 5
上传资源 快速赚钱
- 我的内容管理 展开
- 我的资源 快来上传第一个资源
- 我的收益 登录查看自己的收益
- 我的积分 登录查看自己的积分
- 我的C币 登录后查看C币余额
- 我的收藏
- 我的下载
- 下载帮助
安全验证
文档复制为VIP权益,开通VIP直接复制
信息提交成功