
Beginners Guide to PLX DAQ v2 by Net^Devil (rev1) Page 1 of 12
Beginners Guide to PLX DAQ v2 by Net^Devil
(Revision 1)
Table of content
1. About the program and its use........................................................................................................1
2. How to use.......................................................................................................................................2
3. The Excel UI part..............................................................................................................................2
4. The Arduino part - overview............................................................................................................4
5. The Arduino part - Basic setup and communication .......................................................................4
6. The Arduino part - specific communication and manipulation .......................................................5
7. The Arduino part - Excel workbook commands ..............................................................................7
8. The Arduino part - Miscellaneous commands.................................................................................8
9. Doing your own stuff .......................................................................................................................9
10. Upgrading PLX DAQ v2 Excel versions .........................................................................................9
11. Full blown demo ..........................................................................................................................9
1. About the program and its use
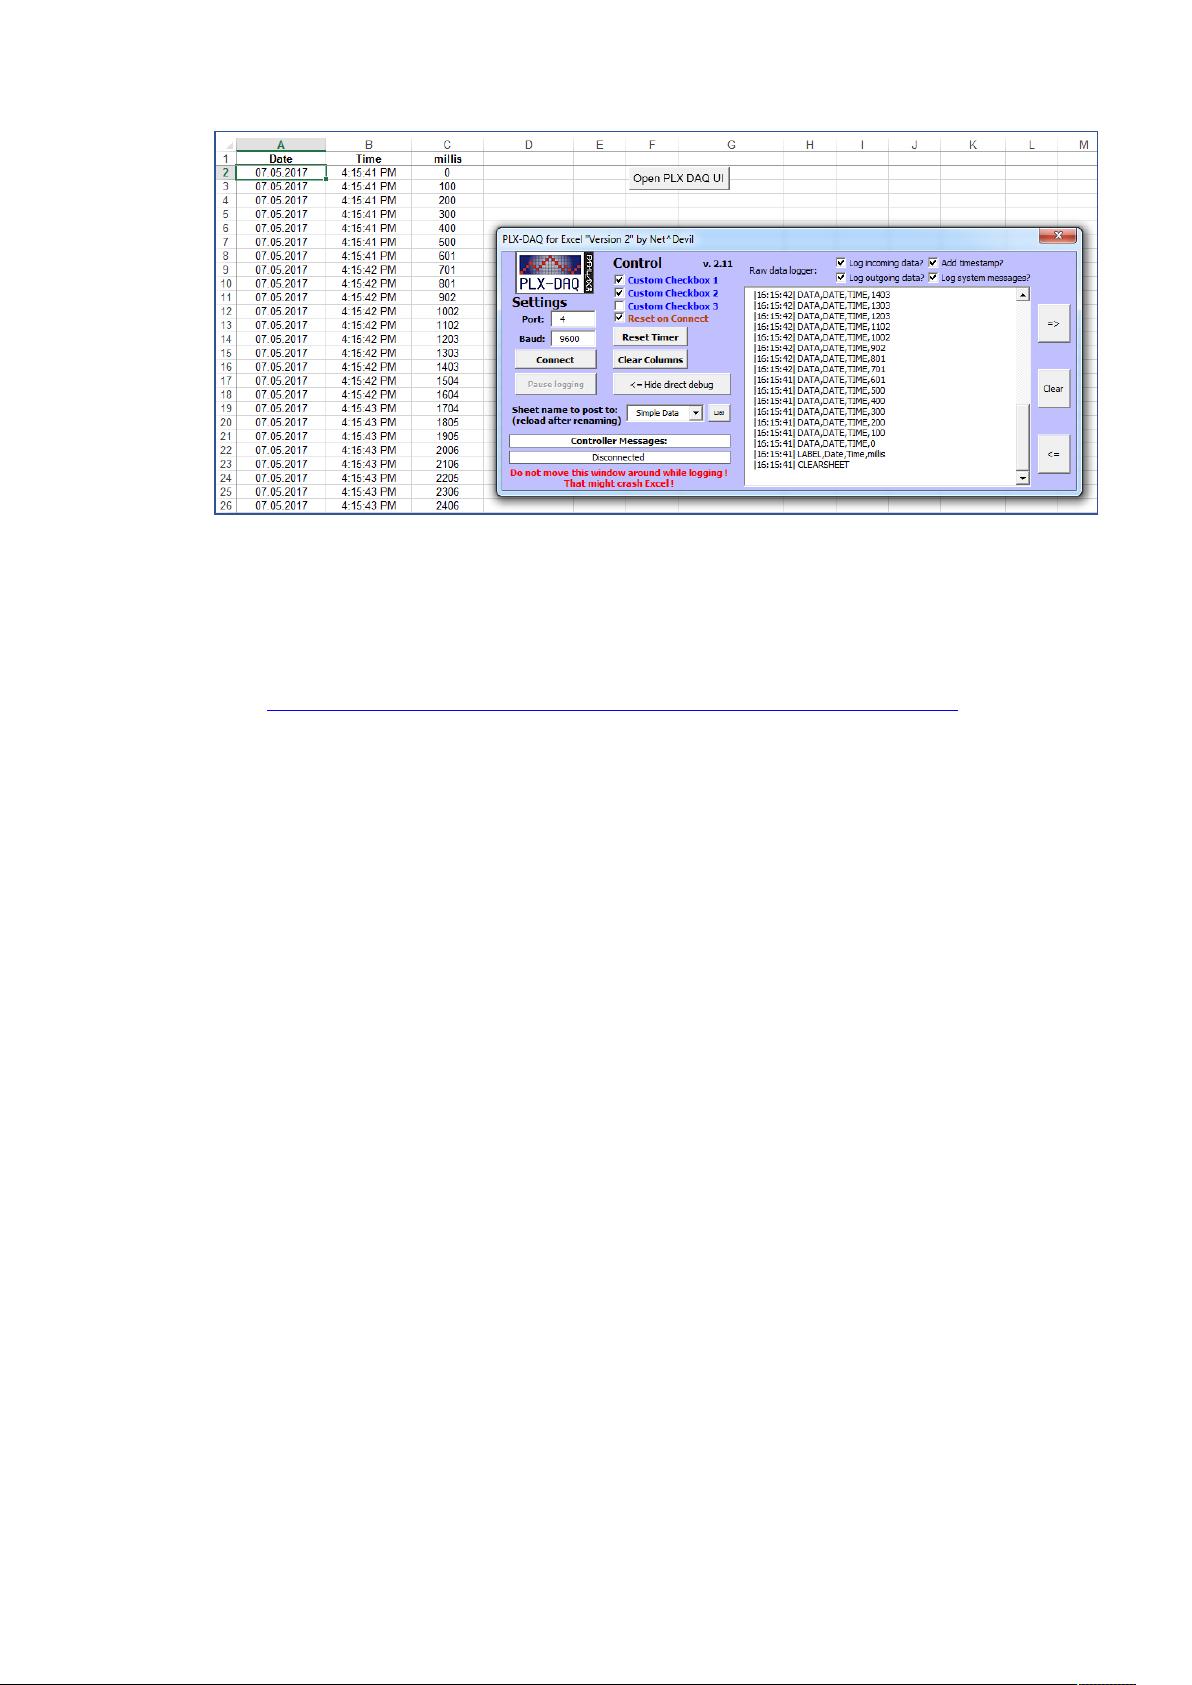
PLX DAQ v2 is a program used to establish an easy communication between Microsoft Excel
on a Windows Computer and any device that supports serial port protocol. It was
intentionally written to allow communication between Arduino and Excel.
You can, for example, measure temperature data with your Arduino, send the results to Excel
every 10 seconds, printed the data on a sheet and draw a graph with all information. All
communication will be done by Serial.println commands just like the commands you
use to send from Arduino to monitor in your Arduino IDE Serial Monitor.
The output of
void loop() {
Serial.println( (String) "DATA,DATE,TIME," + millis() );
delay(100);
}