More advanced Python & Tkinter 更高级的 Python 和 Tkinter.doc
版权申诉
45 浏览量
2024-04-03
10:38:35
上传
评论
收藏 163KB DOC 举报

AND
Well done!
You’ve made it through the forest of Tkinter, past the haunted lake of Pmw
and emerged (fairly) unscathed from a duel with Tabnanny. Good on ya!
Now, it gets REALLY interesting
Obviously, you’ve all read the study design for Unit 4 and you would know that
the SAC for Outcome 1 is as follows:
“On completion of this unit the student should be
able to apply the stages of software development
to produce purpose-designed software that takes
into account a networked information system
objective and the needs of end-users.”
A few key words here that I have highlighted for you:
Firstly – You have to design your own software (just like in Unit 3) using
Python to meet an objective
Secondly – We need to use a networked information system – so that a
number of people can use the system simultaneously. Remember your SAC
in Unit 3? Well, really only one user at a time could use it – NO GOOD for a
networked system
Thirdly – we need to meet the needs of the users of a particular scenario
So, what we’re going to do is create a GUI (Graphical User Interface) using
Tkinter, to allow us to enter and retrieve data that is saved in a MySQL
database.
I’m not going to go into a great deal about what MySQL is, how it works etc.,
short of saying that its FREE, you can download it at home if you want, it’s a
database and its pretty common throughout the world. There are lots of
variations on it (PostGreSQL, MSSQL amongst others)
If you want more information – go to www.mysql.com and there’s loads of
information
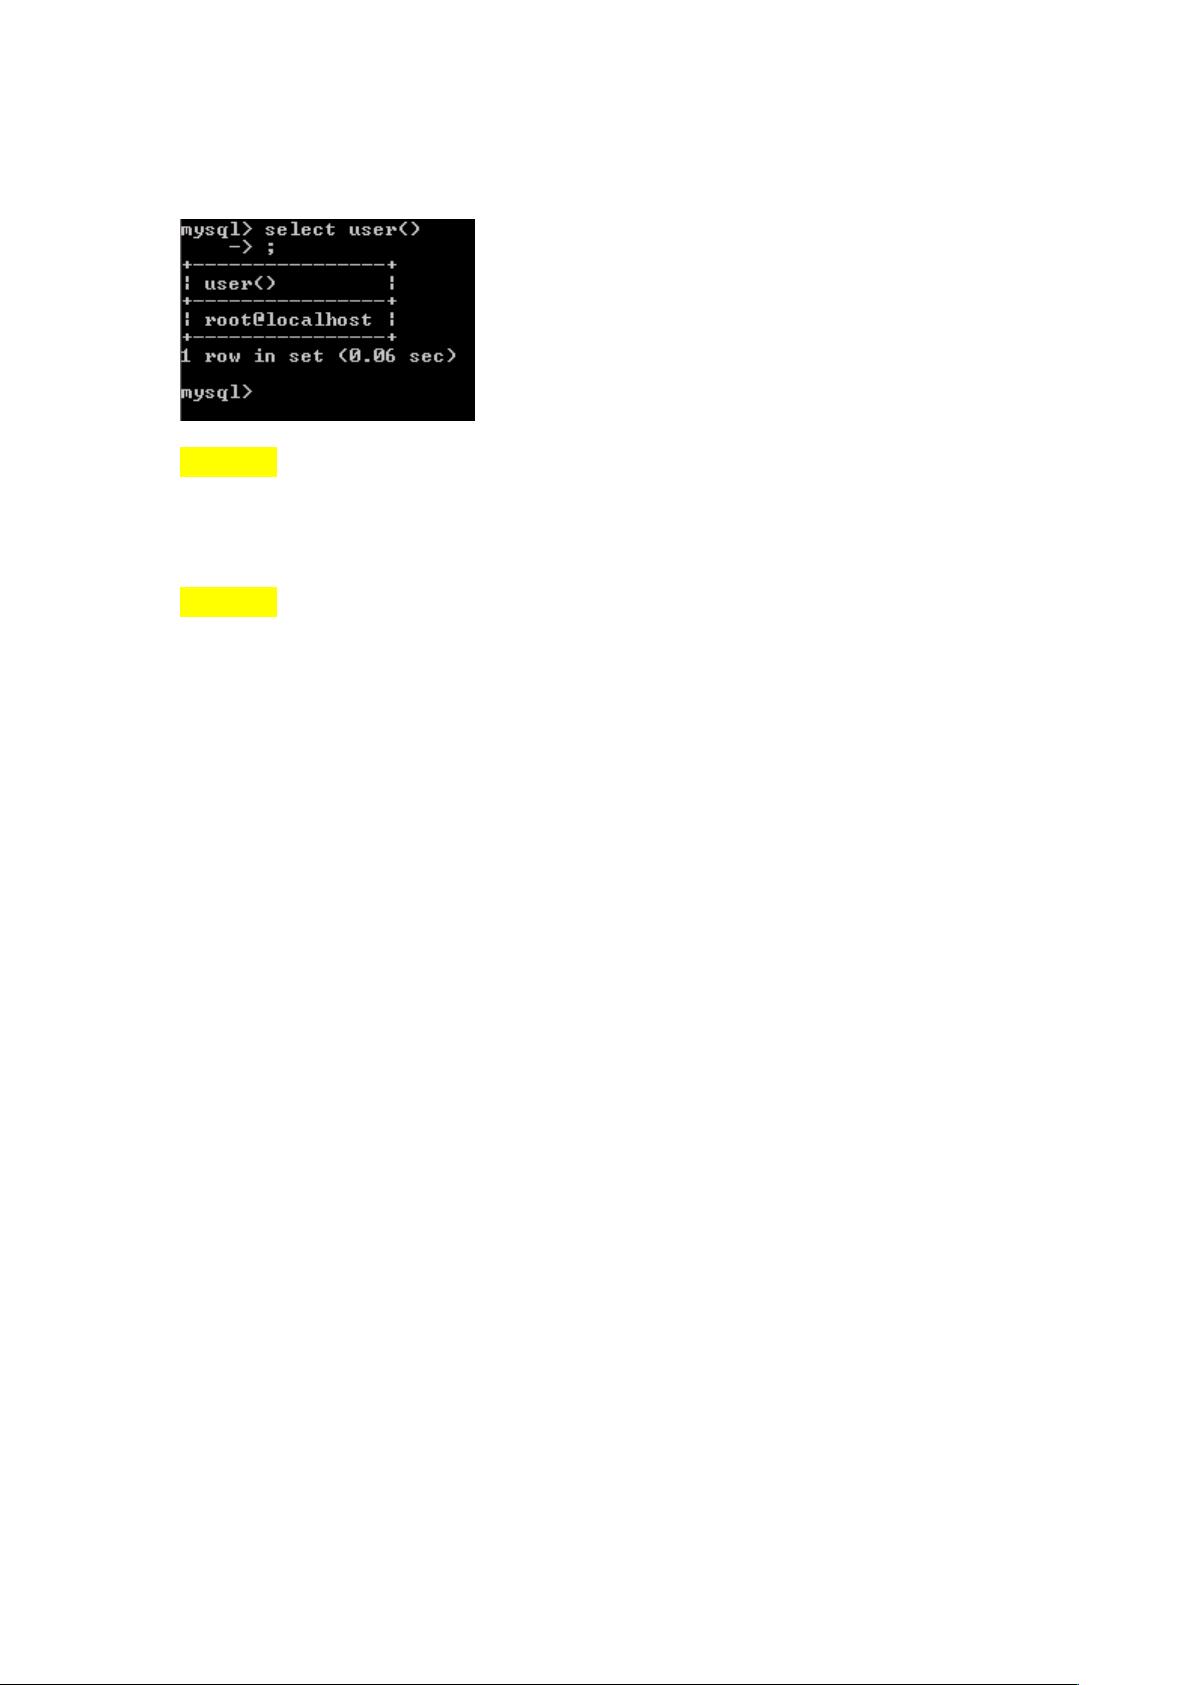
On with the show…


剩余15页未读,继续阅读
资源评论


百态老人
- 粉丝: 1641
- 资源: 2万+

下载权益

C知道特权

VIP文章

课程特权
开通VIP


