


LON-LAT Connection Kit V3.0 page 1

LON-LAT Connection Kit V3.0 page 2
LON-LAT Connection Kit V3
Thank you for working with the LON-LAT Connection Kit.
We have put a lot of effort in making this plugin, so we hope you'll make great stuff with it.
If you can, please send us some examples of your work, we really would like to see what you do with it.
Table of Contents
Installing the LON-LAT Connection Kit ...................................................................................... 3
Using the LON-LAT Connection Kit V3 Plugin ........................................................................... 3
FROM - TO Tab...................................................................................................................... 3
Using Open Street Model (OSM) to select country - city. .................................................... 4
Settings Tab .......................................................................................................................... 4
File Input Tab ........................................................................................................................ 6
Country Splines ..................................................................................................................... 8
About Tab ............................................................................................................................. 9
Help menu ............................................................................................................................ 9
Using the LON-LAT Connection Kit Library ............................................................................... 9
Base Globes .......................................................................................................................... 9
Location Markers ................................................................................................................ 10
Lines .................................................................................................................................... 10
Support and questions ............................................................................................................ 11
Acknowledgments and links ................................................................................................... 11
Examples ................................................................................................................................. 12
Disclaimer ................................................................................................................................ 13
Appendix A – Country splines ................................................................................................. 15
LON-LAT Connection Kit V3.0 page 3
Installing the LON-LAT Connection Kit
- unzip the downloaded file
- copy the plugin directory “LON-LAT Connection Kit V3” to your Cinema 4D plugins directory
- copy the LON-LAT Connection Kit Library to your Cinema 4D library\browser\ directory
- copy your license.lic file to the plugins\LON-LAT Connection Kit V3 directory
- After installing the plugin and library, restart Cinema 4D
The plugin automatically looks for the license file. If the license is not found, you are notified and a message
is displayed where to get a license.
Note: An Internet connection is required to use the OSM search and to get access to this manual using the
Help command
Using the LON-LAT Connection Kit V3 Plugin
When you open LON-LAT Connection Kit (Plugins > LON-LAT Connection Kit V3) the plugin menu is
displayed in the attribute manager. If you like, you can undock the menu using standard commands. The
Plugin menu contains five tabs: From-To, Settings, File Input and About.
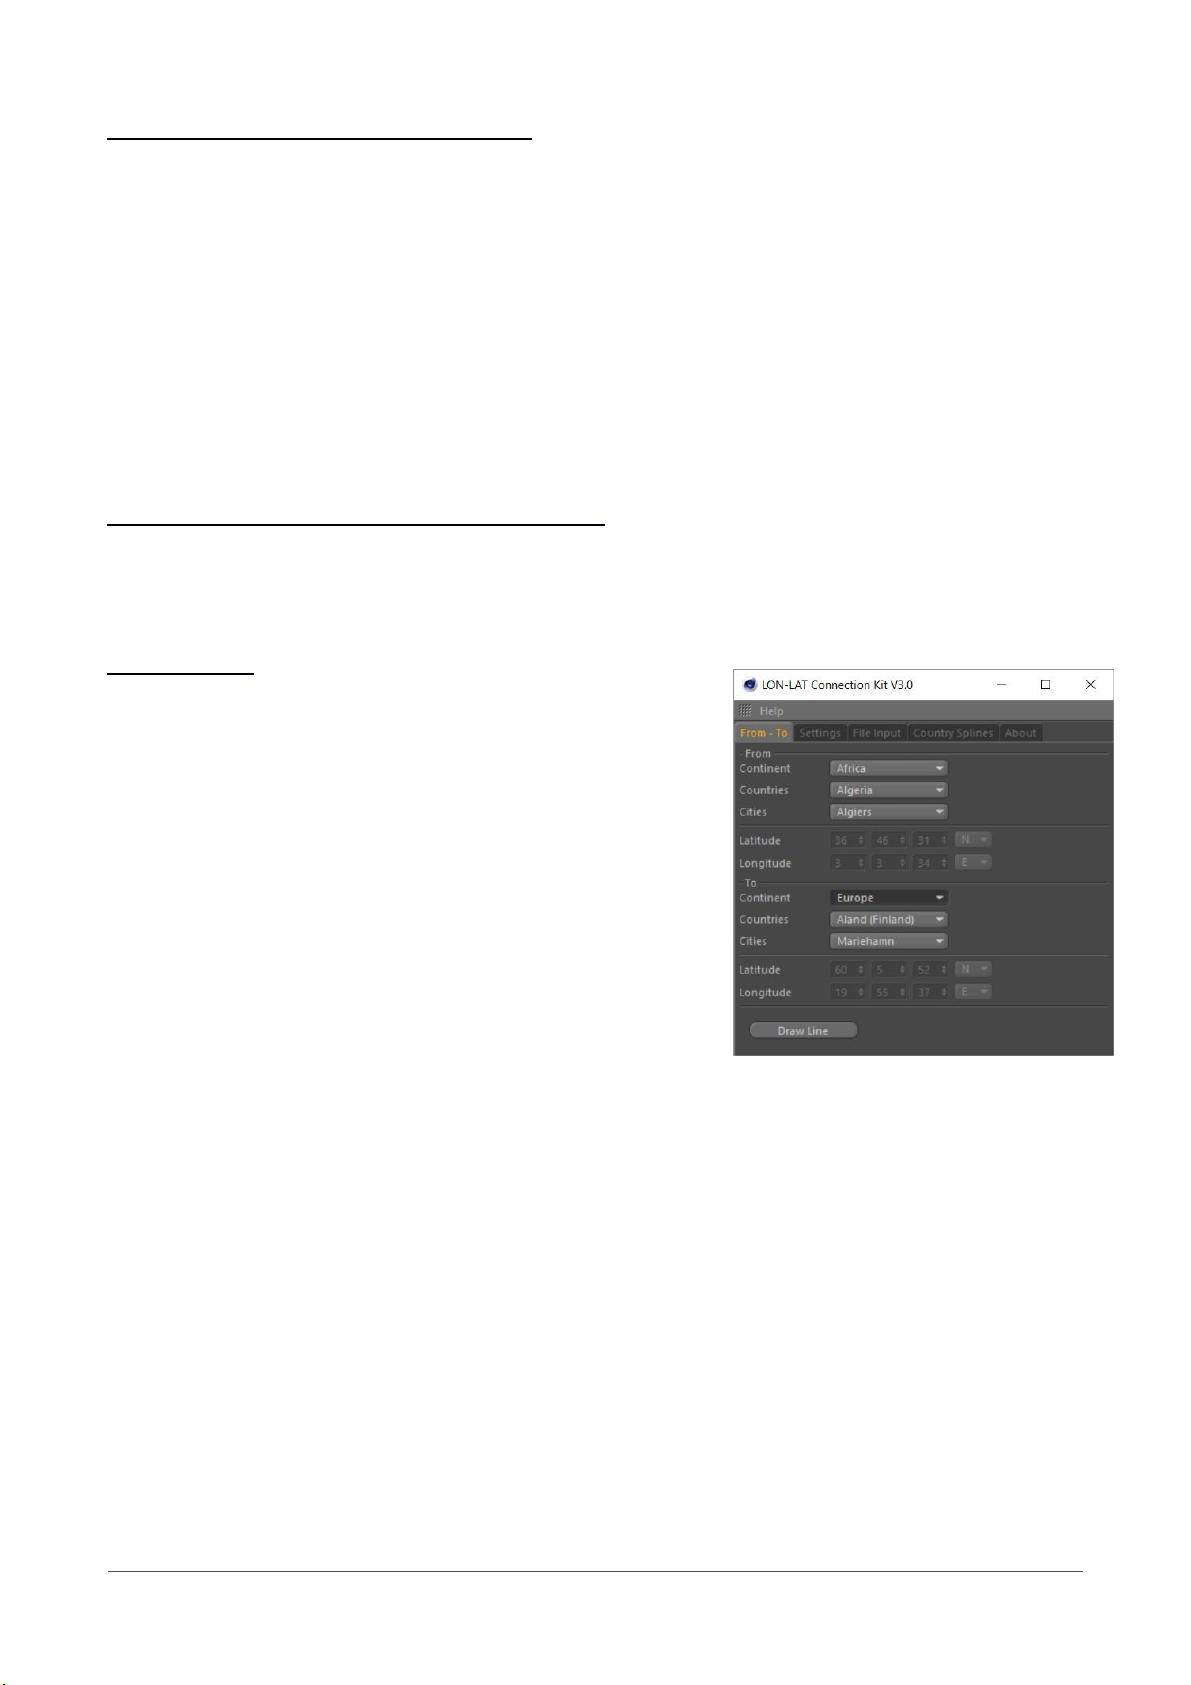
FROM - TO Tab
In this tab you can manually create your locations and connections.
Simply select the continent, country and city to find the location
you need.
Whenever you need a location that is not in the list, you can enter it
manually by choosing ‘Custom’ as Continent. Now you can enter
the Latitude and Longitude coordinates to define your location.
When done, click ‘Draw Line’ to create the locations as well as a
path between them.
The plugin will create two location objects and an arc between the
chosen locations. The location objects will be named according to
the selected city or the LON-LAT coordinates, e.g. “New York City”
or “Custom 0:0:0 N - 0:0:0 E”.
This will allow to have labels that will dynamically display the locations name. The created connection will be
named “1
st
location - 2
nd
location – distance [Km]”, e.g. “New York City - Amsterdam - 5900”.
Note: Locations will be created only once. Thus if a location was already created, no new location will be
created.
Note: The height of the arc is related to the distance. The longer the distance between the
locations, the higher the arc will be.
Alt Key
If the Alt key is pressed when “Draw Line” is clicked, the selected connection is written to an output file and
can be used to copy to your own connections file.
The output file is named after your c4d scene name + “.txt”.
For example: when you would be working in “scene.c4d”, the output file will be “scene.c4d.out”.
If the scene is not yet stored, the output is stored in your c4d preference folder.
LON-LAT Connection Kit V3.0 page 4
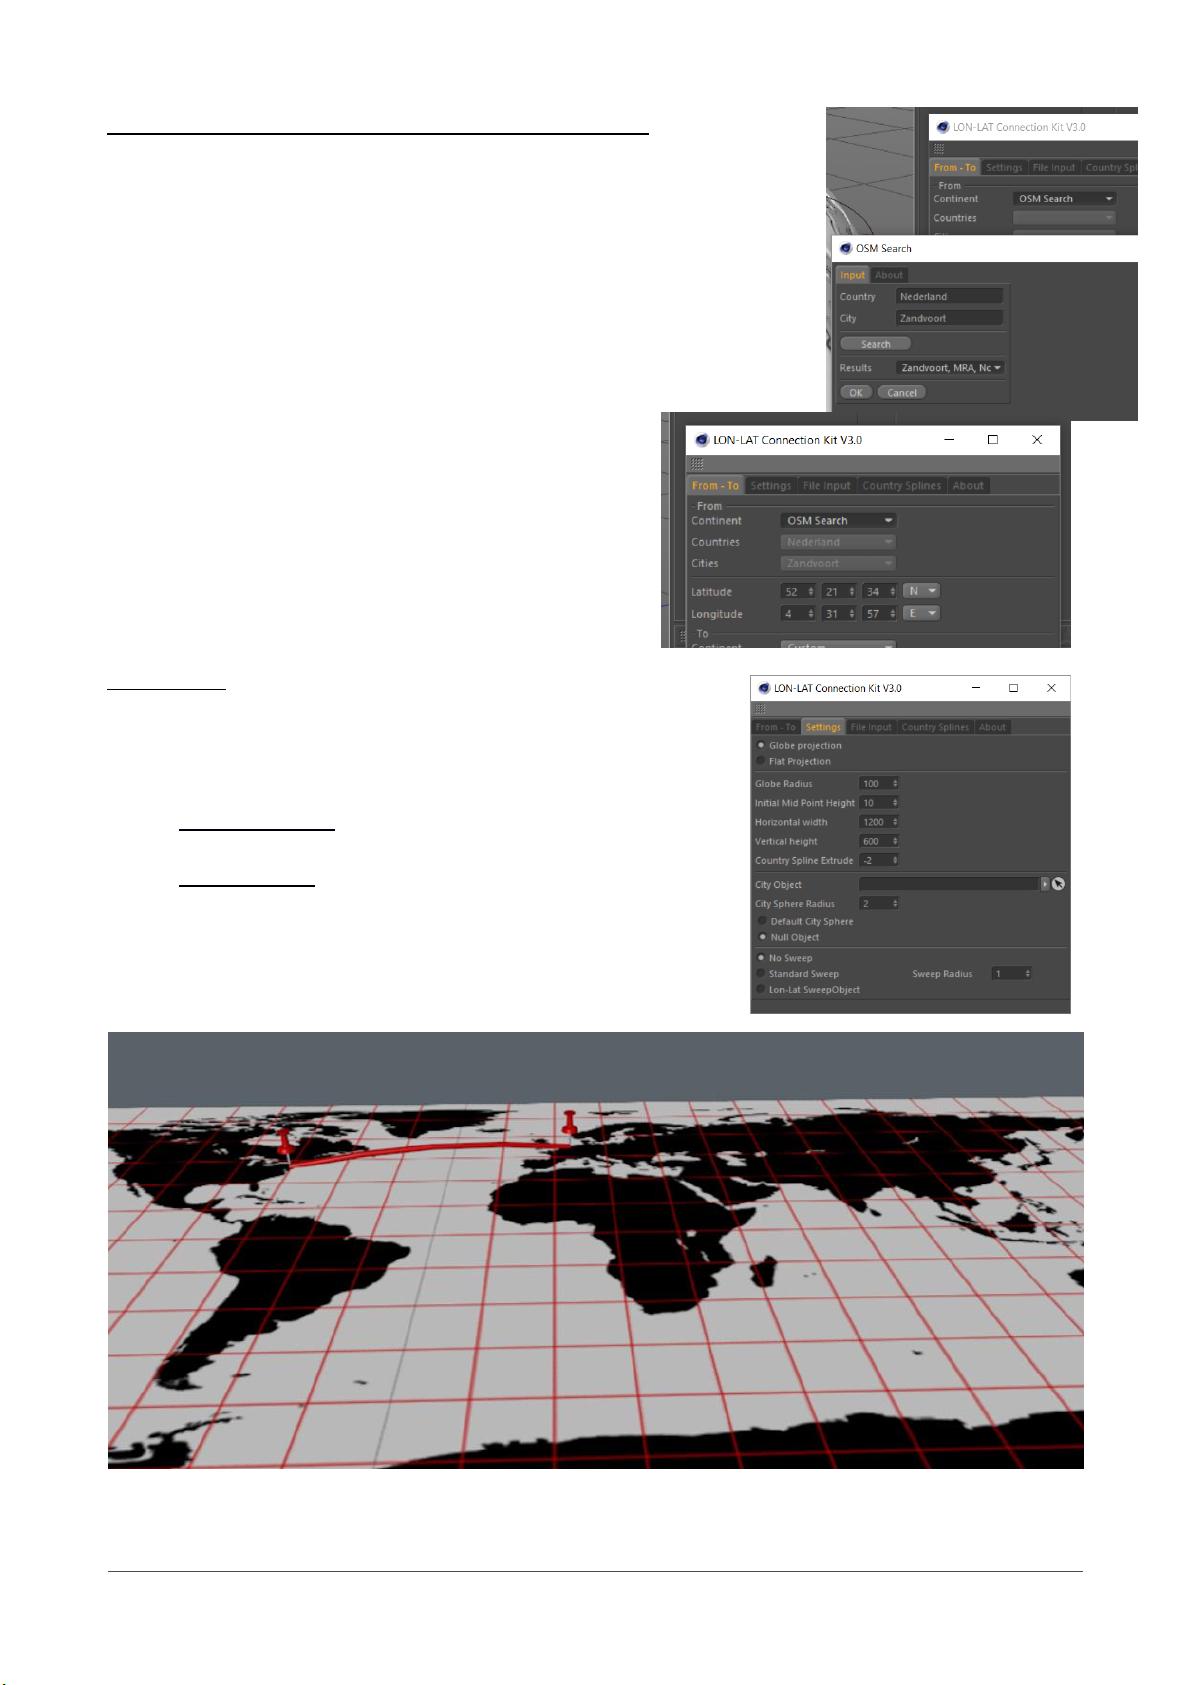
Using Open Street Model (OSM) to select country - city.
When the country – city cannot be found in the standard option, you can use
OSM search to select your country – city.
In the From – To dialog, select OSM Search. The OSM dialog will then be
opened. Here you can specify the country – city you are looking for.
Click “Search” and select the option you are looking for.
Then click “OK”
The results, including Longitude and Latitude, will be
filled in the FROM – TO dialog.
Note: An Internet connection is required to use the OSM
search!
Settings Tab
This is where the settings are for the creation of the locations and the
path between them.
- Globe projection / Flat projection.
Globe projection: Cities and connection arc will be placed
according a globe with radius setting “Globe Radius”.
Flat projection: Cities and connection arc will be placed in the
XZ plane using settings “Horizontal width” and “Vertical
height”.
Example: Flat projection FROM Netherlands, Amsterdam TO USA, New York City.
LON-LAT Connection Kit V3.0 page 5
Note: A flat earth scene is provided with LON-LAT Connection Kit V3.0.
- Globe Radius: the radius of the globe, used to calculate the LON-LAT coordinates on the globe.
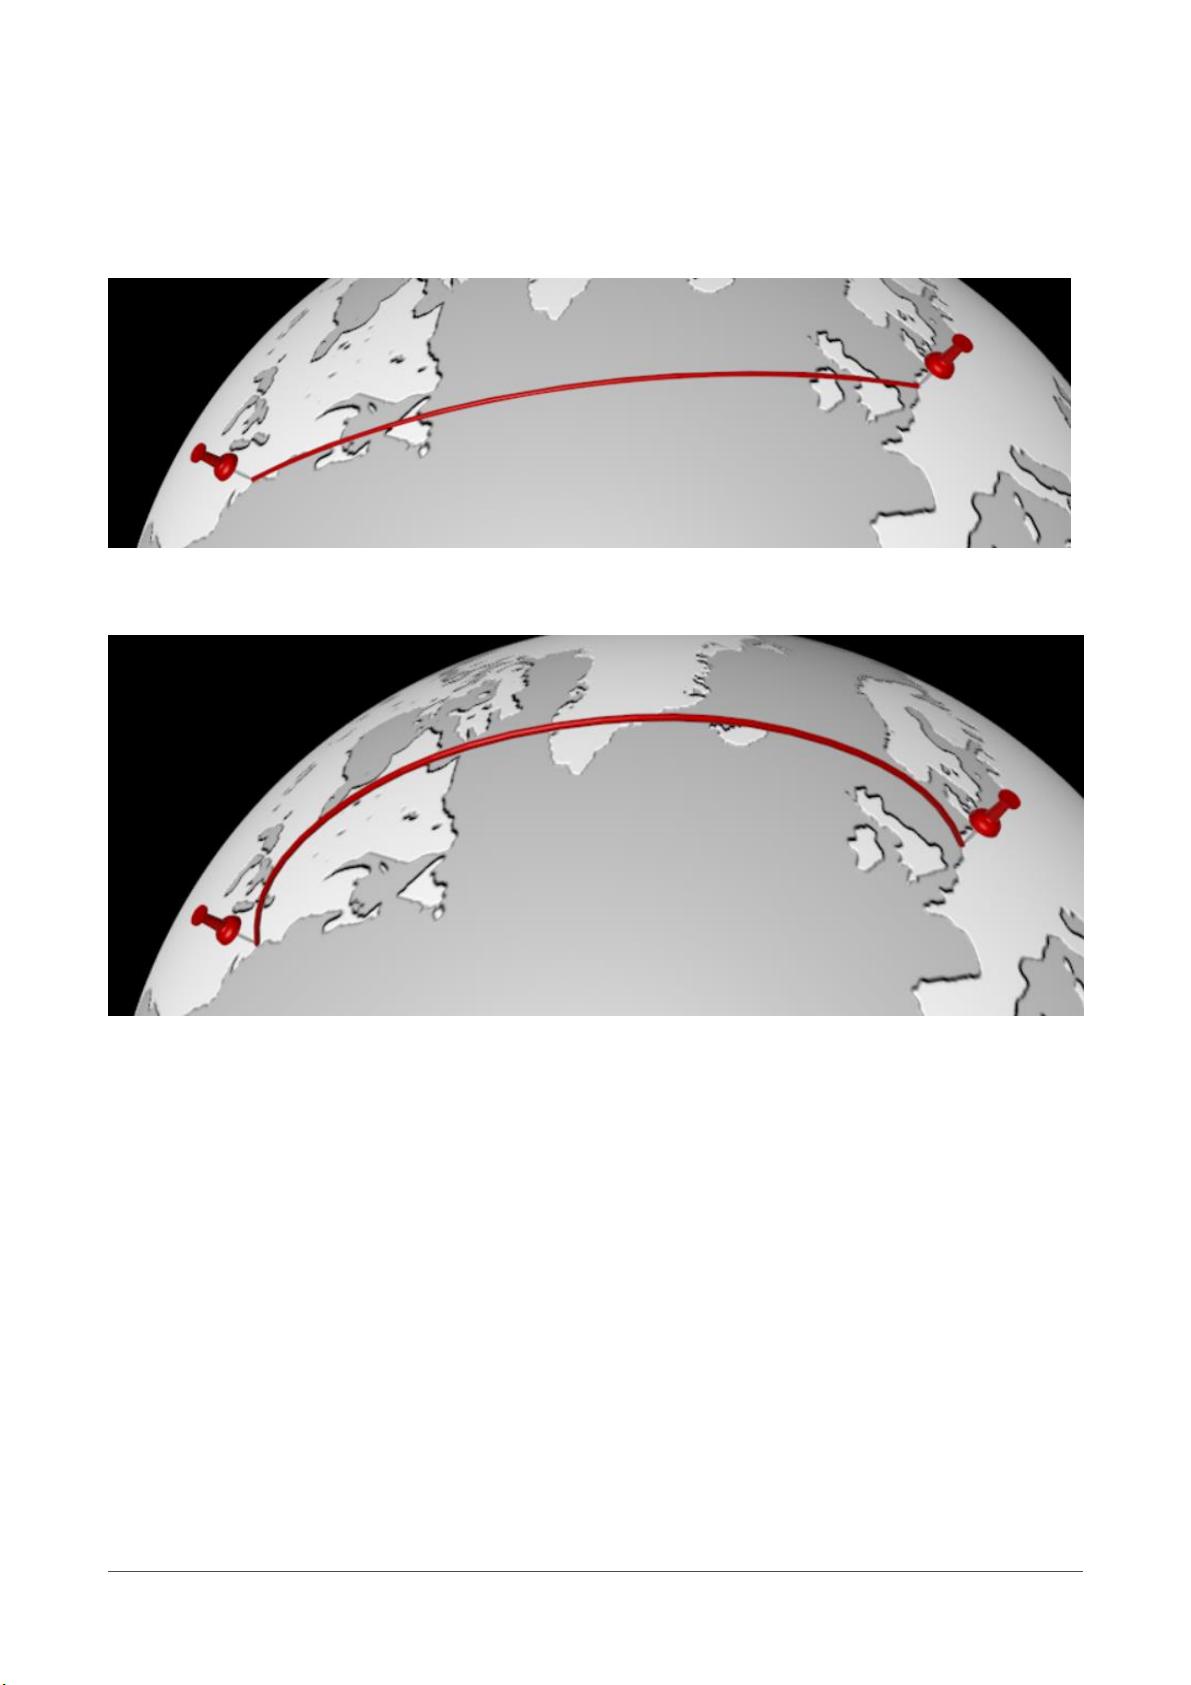
- Initial Mid-Point Height settings: The maximum height of the Arc. The longer the distance between
the locations, the higher the arc will be.
Example: Globe projection with Mid-Point Height = 0. This way “straight” lines can be made.
Note: A simple (low res) globe scene is provided with LON-LAT Connection Kit V3.0.
Example: Globe projection with Mid-Point Height = 20.
- City object: this setting defines what object will be used when creating the locations on the globe. If
“City Object” is left empty, you can use the radio button to select a standard Sphere, or a Null
object.
Note: In above examples the Modern Pushpin marker is used. Markers can be found in the LON-LAT
Connection Kit V3 library.
- City Sphere Radius: defines the radius of the Default City Sphere when selected.
Note: If you want to change the location objects at a later time, you can use an Instance object pointing to
an empty Null. By putting child objects into this Null object, the locations will appear differently.
Note: Country Spline Extrude setting is discussed in chapter “Country Splines”.


