ImJoy Jupyter Extension
============
Try the demo here: [](https://mybinder.org/v2/gh/imjoy-team/imjoy-binder-image/master?filepath=imjoy-jupyter-tutorial.ipynb)
## Using ImJoy with Jupyter Notebook and JupyterLab
This extension utilizes the [imjoy-rpc](https://github.com/imjoy-team/imjoy-rpc) library to enable bidirectional RPC calls between the ImJoy core and plugins.
The library has an abstract transport interface that can support different types of transport. For now, we support [Jupyter comms message](https://jupyter-notebook.readthedocs.io/en/stable/comms.html) which is a custom message protocol used in Jupyter notebooks (for example powers jupyter widgets).
To use it, you need to install the `imjoy-jupyter-extension` in Python which will also include the imjoy-rpc as a dependency (see below).
### Install the extension for Jupyter Notebook or JupyterLab
For Jupyter Notebook, run:
```bash
pip install -U imjoy-jupyter-extension
```
For Jupyter Lab, run:
```bash
pip install -U imjoy-jupyter-extension
jupyter labextension install imjoy-jupyter-extension
```
### Use ImJoy plugins inside Jupyter notebooks
Now you can start a jupyter notebook via for example `jupyter notebook` command, you should be able to see an ImJoy icon in the toolbar if everything goes well.

For JupyterLab, start it via `jupyter lab` command, then create a notebook and you should see an ImJoy button in the toolbar:

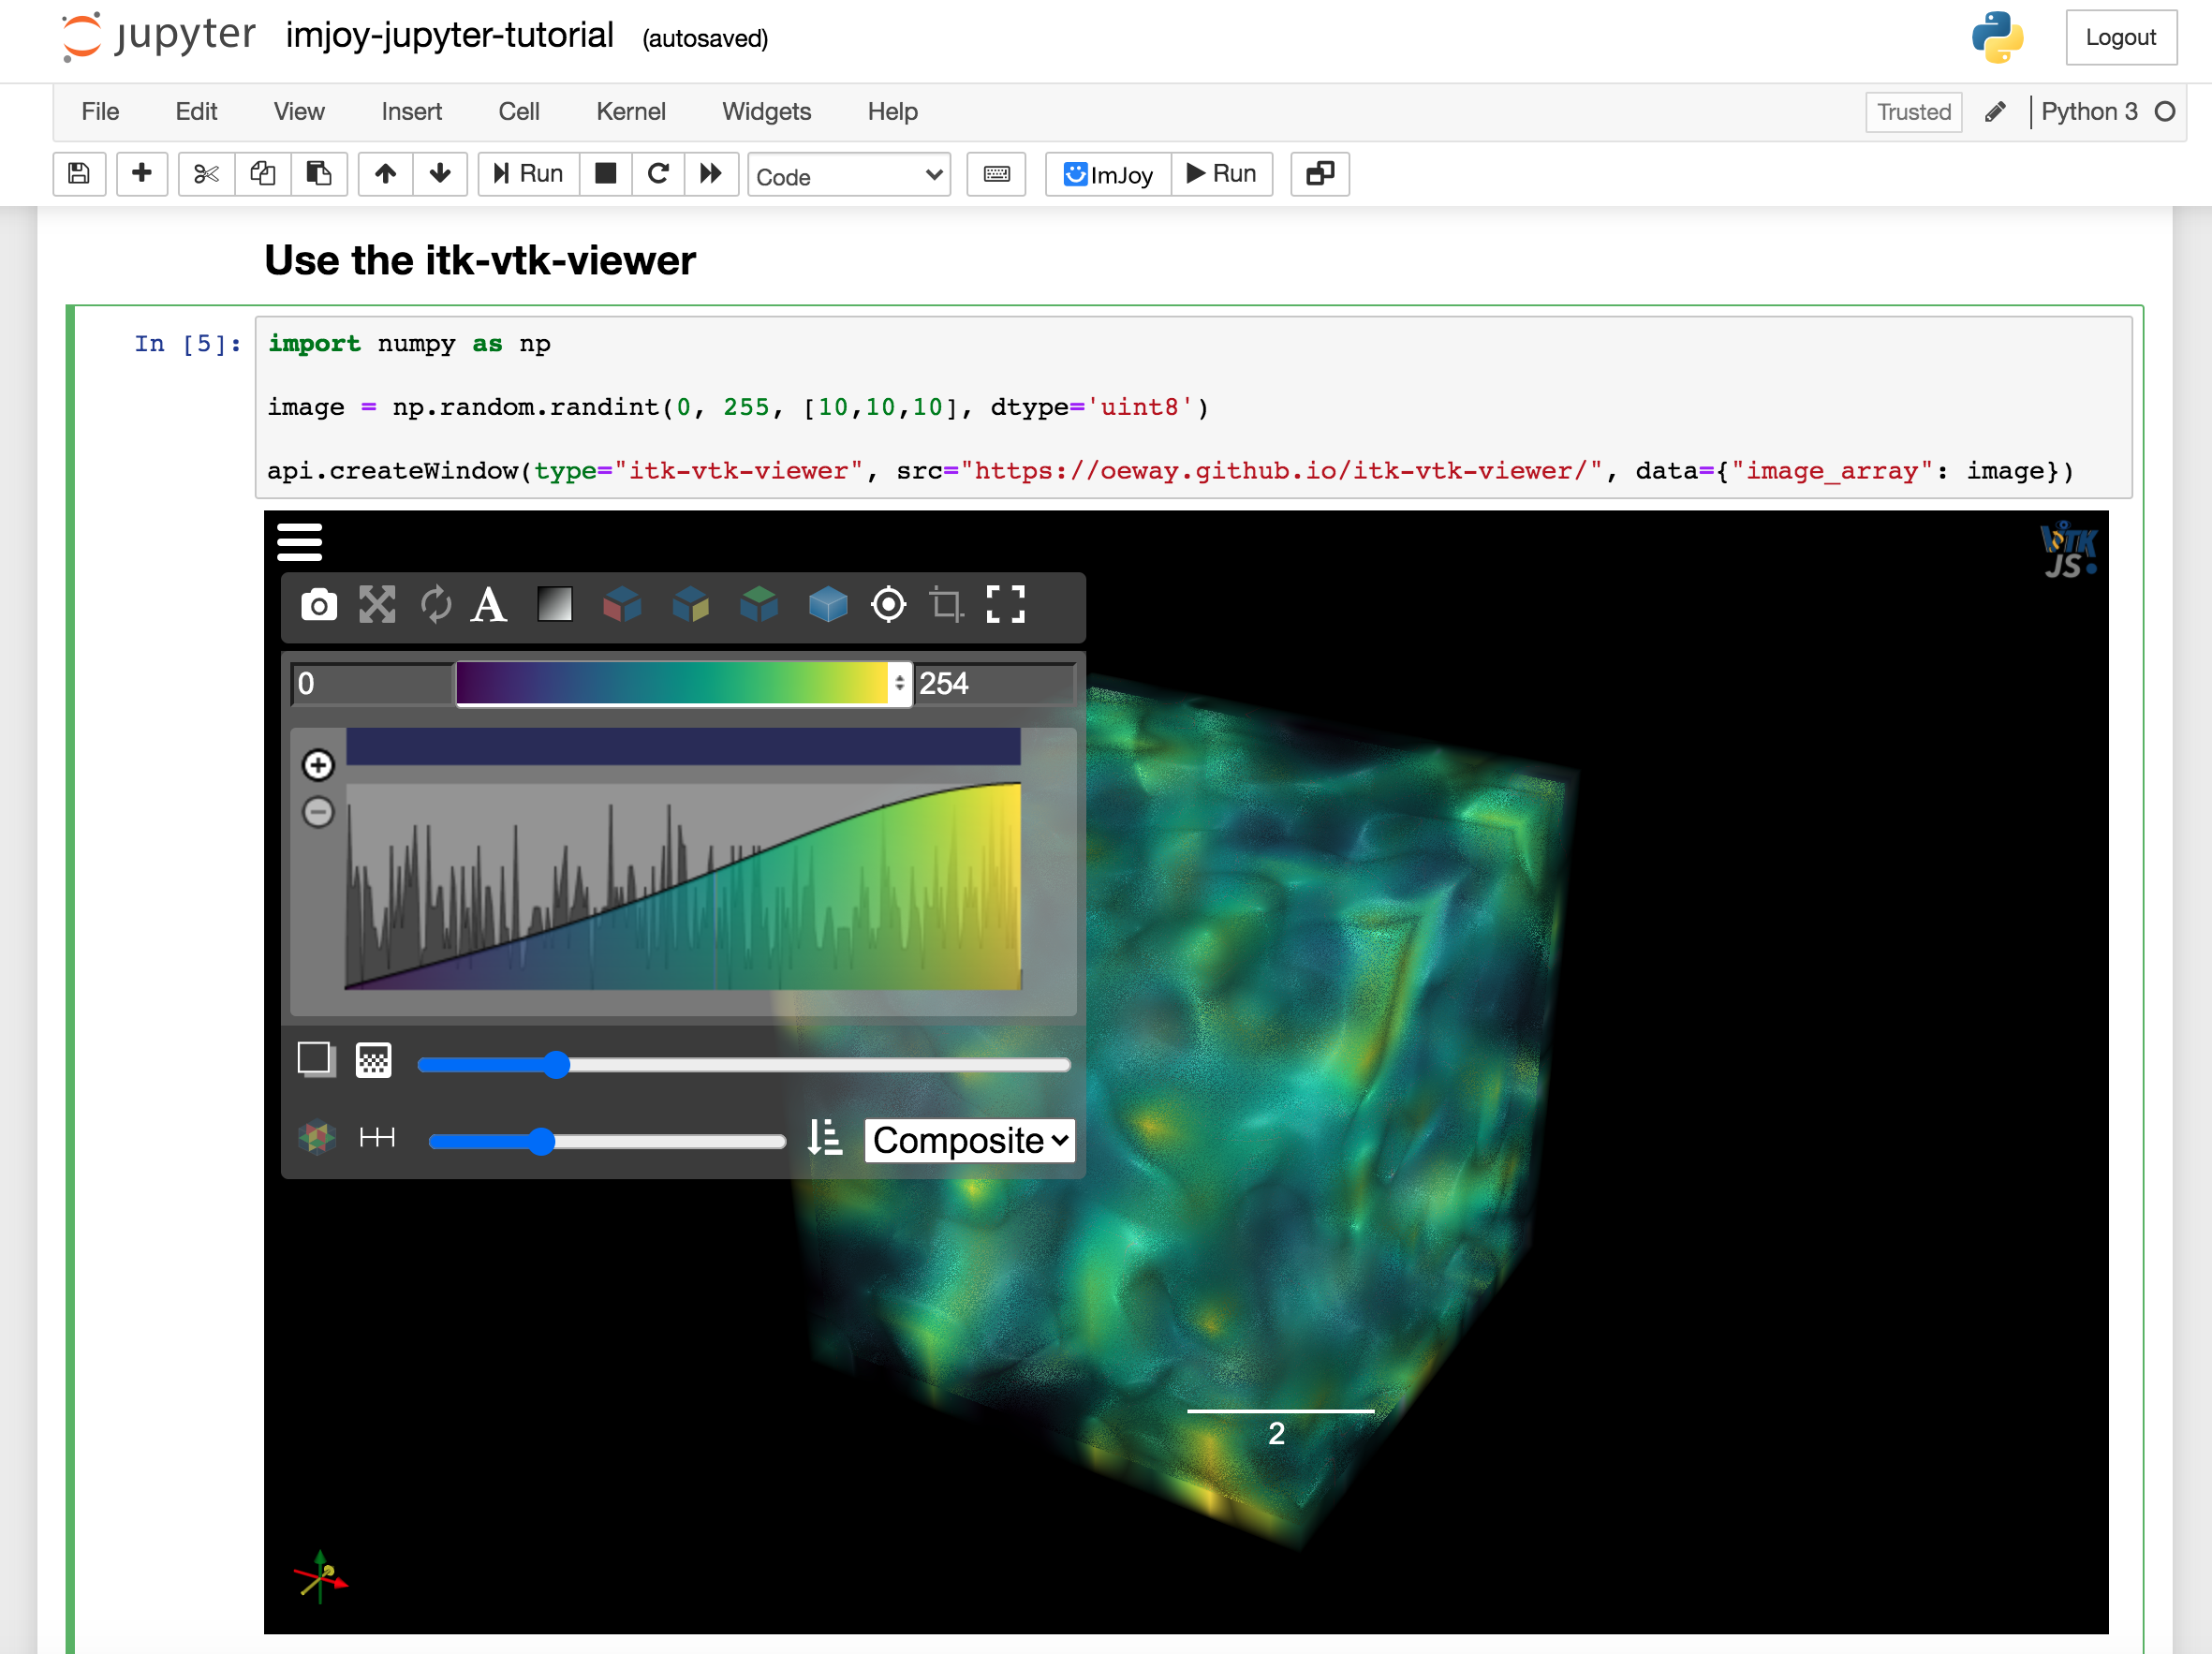
Now run ImJoy plugins in a cell, see an example that uses itk-vtk-viewer to visualize images:
```python
import imageio
import numpy as np
from imjoy_rpc import api
class ImJoyPlugin():
def setup(self):
api.log('plugin initialized')
async def run(self, ctx):
viewer = await api.showDialog(src="https://kitware.github.io/itk-vtk-viewer/app/")
# show a 3D volume
image_array = np.random.randint(0, 255, [10,10,10], dtype='uint8')
# show a 2D image
# image_array = imageio.imread('imageio:chelsea.png')
await viewer.setImage(image_array)
api.export(ImJoyPlugin())
```
With the above code, you created an ImJoy plugin. To run it, click the Run button with the ImJoy icon. It will then call the run function of your plugin.
* GIF Demo: [Visualizing 2D image](https://ibb.co/XDFF5bQ)
* GIF Demo: [Visualizing 3D volume](https://ibb.co/QXR63XM)
* GIF Demo: [Load ImageAnnotator](https://ibb.co/0Zyfxkr)
You can also do the reverse by running a notebook inside ImJoy, to do that, please first create an empty jupyter notebook. Then copy and paste the url into the "+ PLUGINS" dialog, press enter and install the plugin. Click the newly installed plugin and you will get a notebook page open in ImJoy.
Try to copy and paste the itk-vtk-viewer example to a cell and execute it. Similarily, if you now click the run ImJoy button in the toolbar, you will get the viewer open insided ImJoy.
### Load plugin dynamically in a notebook
There are different ways to load a plugin in a notebook, you can load from URL for the source code of the plugin (e.g. gist or github file url) or a hosted web app (e.g. the itk-vtk-viewer app used above). Besides that, you can also write a window plugin directly in a notebook. This is practical especially for debugging window plugin for your GUI.
You can directly pass a string with the plugin source code to `api.getPlugin`, `api.createWindow(src=...)` or `api.showDialog(src=...)`, however, that doesn't give you syntax highliting in a Jupyter notebook cell. A workaround solution (which also works for Google Colab) is to write plugin code in a seperate cell startting with `## ImJoy Plugin` and wrap the source code with `IPython.display.HTML()`. For example:
```html
## ImJoy Plugin
from IPython.display import HTML
my_plugin_source = HTML('''
<docs lang="markdown">
[TODO: write documentation for this plugin.]
</docs>
<config lang="json">
{
"name": "Untitled Plugin",
"type": "window",
"tags": [],
"ui": "",
"version": "0.1.0",
"cover": "",
"description": "[TODO: describe this plugin with one sentence.]",
"icon": "extension",
"inputs": null,
"outputs": null,
"api_version": "0.1.8",
"env": "",
"permissions": [],
"requirements": [],
"dependencies": [],
"defaults": {"w": 20, "h": 10}
}
</config>
<script lang="javascript">
class ImJoyPlugin {
async setup() {
api.log('initialized')
}
async run(ctx) {
}
}
api.export(new ImJoyPlugin())
</script>
<window lang="html">
<div>
<p>
Hello World
</p>
</div>
</window>
<style lang="css">
</style>
''')
```
Then in another cell, you can passing the plugin source code to `api.getPlugin`, `api.createWindow(src=...)` or `api.showDialog(src=...)` to make an actually plugin:
```python
from imjoy_rpc import api
class ImJoyPlugin():
async def setup(self):
pass
async def run(self, ctx):
# for regular plugin
# p = await api.getPlugin(my_plugin_source)
# or for window plugin
# await api.createWindow(src=my_plugin_source)
await api.showDialog(src=my_plugin_source)
api.export(ImJoyPlugin())
```
## Development
To develop the JupyterLab extension, open a terminal and run:
```bash
cd imjoy_jupyterlab_extension
npm run watch
```
In another terminal window run:
```
jupyter labextension install ./imjoy_jupyterlab_extension
```
PyPI 官网下载 | imjoy-jupyter-extension-0.2.13.tar.gz
版权申诉
196 浏览量
2022-01-12
14:23:38
上传
评论
收藏 23KB GZ 举报

 imjoy-jupyter-extension-0.2.13.tar.gz (16个子文件)
  imjoy-jupyter-extension-0.2.13
  setup.cfg 38B README.md 6KB PKG-INFO 7KB imjoy_jupyter_extension.json 80B imjoy_jupyter_extension.egg-info
  dependency_links.txt 1B not-zip-safe 1B PKG-INFO 7KB SOURCES.txt 552B top_level.txt 24B requires.txt 32B MANIFEST.in 90B setup.py 1KB imjoy_jupyter_extension static imjoy_jupyter_extension.yaml 179B index.js 23KB
 imjoy-icon.png 10KB __init__.py 372B
资源评论


挣扎的蓝藻
- 粉丝: 13w+
- 资源: 15万+


最新资源
- 实验二:IP协议分析.zip
- 驱动代码驱动代码驱动代码驱动代码
- SVID_20240523_141155_1.mp4
- Code for the complete guide to tkinter tutorial
- 关于百货中心供应链管理系统.zip
- SimpleFolderIcon-master 修改Unity的Project下的文件夹图标
- A python Tkinter widget to display tile based maps
- A pure Python library for adding tables to a Tkinter application
- Vector资源文件.zip
- MobaXterm-Installer
资源上传下载、课程学习等过程中有任何疑问或建议,欢迎提出宝贵意见哦~我们会及时处理!
点击此处反馈


