


1
This chapter covers the user interface basics for file handling, schematic capture,
simulation, and data display. In addition, tuning and the use of ADS example files is
also covered.
Lab 1: Basics of using ADS

Lab 1: Basics of using ADS
1-2
OBJECTIVES
• Examine the Main window commands and icons
• Create a new project and schematic design
• Setup and perform an S-parameter simulation
• Display the simulation data on a plot and save files
• Tune the circuit to refine the response
• Look through the Examples and do a Harmonic Balance simulation
PROCEDURE
1. Start the system (instructor will give you instructions)
a. Typically, on a PC, you will use standard method for starting a program
or on UNIX, you would type: hpads.
Main window (PC version)
Lab 1: Basics of using ADS
1-3
NOTE on Interface Differences between UNIX and PC:: The user interface for
the PC and UNIX are the same. The only difference is the appearance and some minor
features: For example, UNIX has tear-off menus; the PC version has a Toolbar that
can be detached from the window. Otherwise, all the functions and commands are the
same for both platforms.
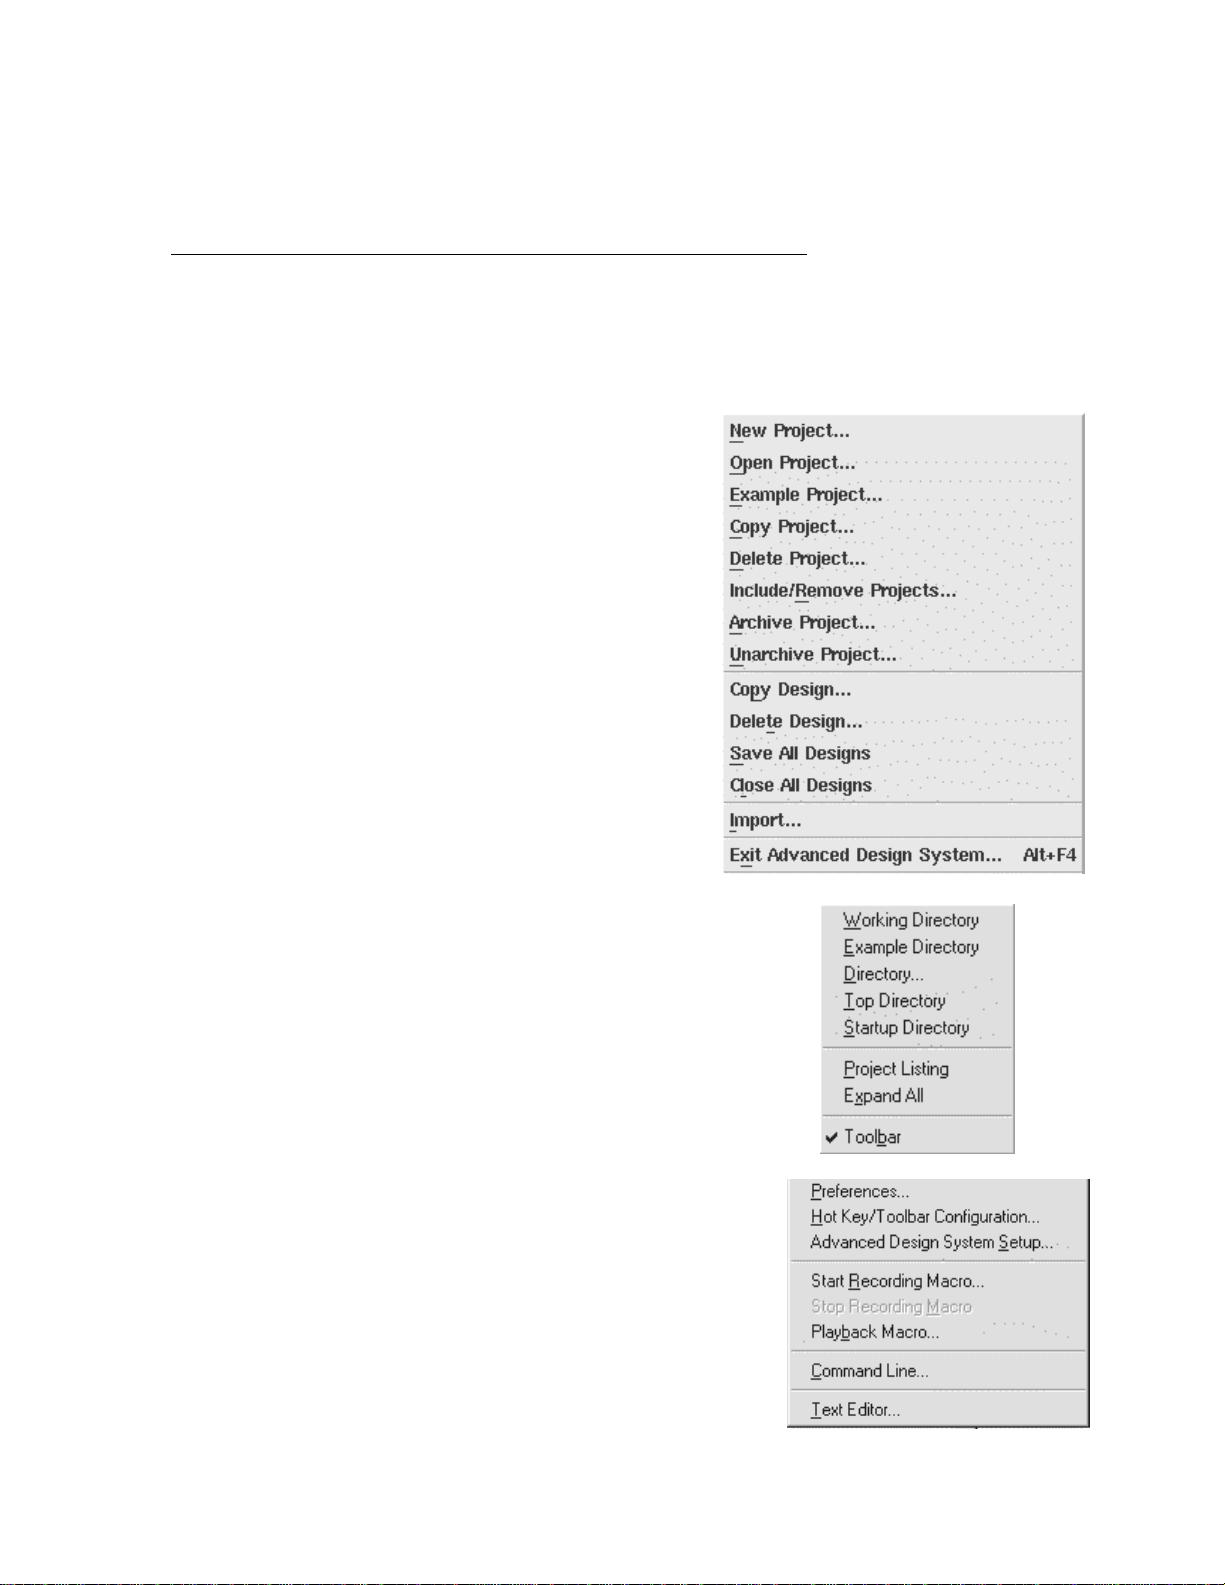
2. Examine the Main Window
a. Click the File command.
These commands are for controlling
and handling projects (directories)
and designs (files) which are
schematics and layouts.
Click on any command with ellipses
(…) and examine the dialog. Then
click the Cancel button as necessary to
return.
This step is only to show you the
menus. Later on, you will be using
these commands which are superior to
using UNIX commands or PC file
managers for ADS.
b. Click the View command.
These commands are specifically used for
changing and viewing directories. Click on any
of the commands to see how they work.
c. Click the Options command.
These are used to setup global elements for
the user interface and for macro recordings.
For now, click Preferences… and a dialog
box will appear (shown here).
Lab 1: Basics of using ADS
1-4
d. In the Preference
dialog, be sure the
Add Project
Extension box is
checked. This
means that all
projects
(directories) you
create in ADS will
automatically be
appended with the
extension _prj so
that you will
recognize them.
For this lab, no
other preferences
should be set.
Click OK when finished.
e. Click Options > Advanced Design
System Setup…
When you first install ADS or when your ADS
system is updated, you will also see this dialog
box. It is used to define which type of
schematic elements and library elements are
the default, depending upon the licenses you
have. For this lab, be sure the settings look
like the picture here – if they do, select
Cancel. If not, check with the instructor.
f. In the Main window, click the Window command.
At this time, most of these commands will not be
available (inactive) because you have not yet created a
project and no other windows are opened. After you
create a project, these commands will be available.
g. The final Main window command is the Help
command. Click Help > Topics and Index and a
new window will open. ADS has Help topics and on-
line manuals. Spend a few moments looking through
the topics and then click Close All.
Lab 1: Basics of using ADS
1-5
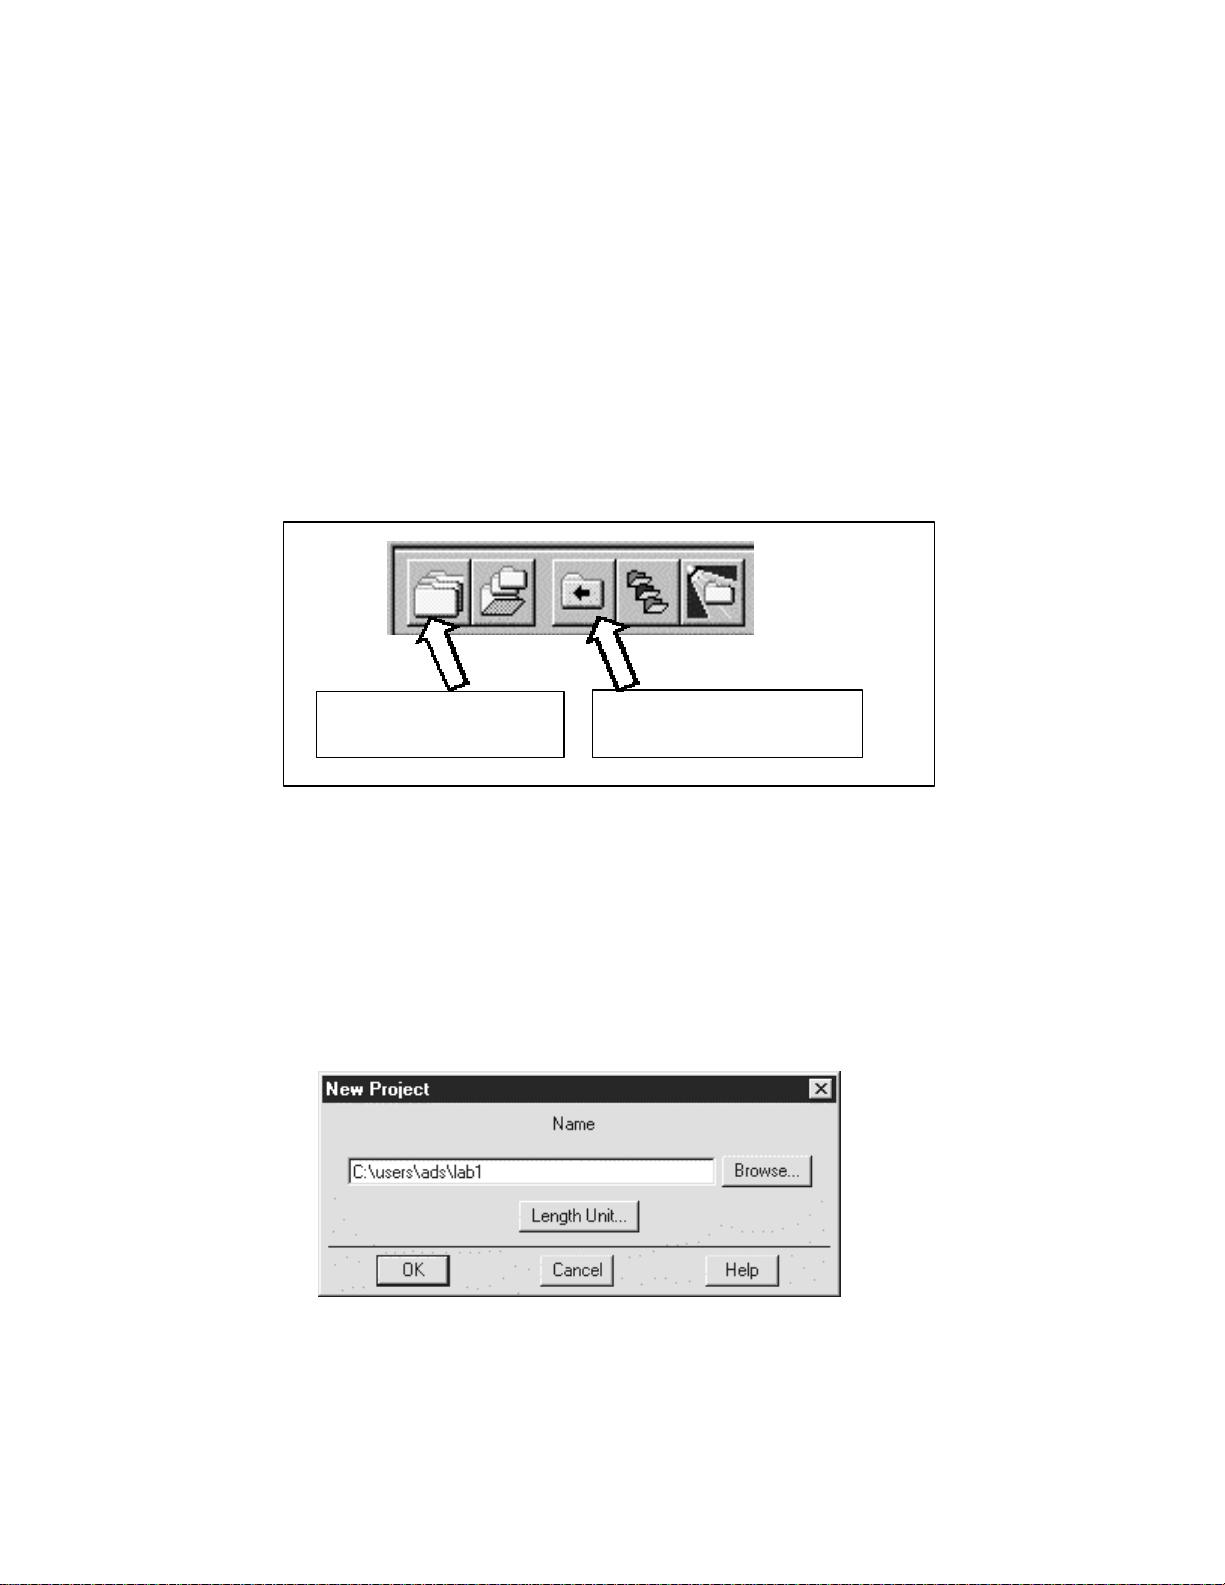
3. Create a new Project
For this step you will use the icons on the Main window. Typically, clicking the correct
icon means you have one less mouse click to execute than using the menu commands.
In addition, you can identify what an icon does by placing the cursor on the icon. This
is called balloon help and is one of the preferences you can turn off or on.
a. Try moving the mouse cursor slowly into the bottom of each icon on the
Main window. You will see the balloon help and learn the icon names.
b. In the Main window, click the icon: View Startup Directory. This will
put you in the starting directory for ADS.
c. Click: File > New Project.
d. When the dialog box appears, give the project a name by typing: lab1.
Notice that the length unit is a setting for items such as microstrip lines and
also used for layout. For this lab use the default value (mil). Notice that
the Browse button allows you to create project directories anywhere you
like. Click OK to continue.
Create a New
Project
View Startup Directory


评论0