Unreal Engine CarSim_Unreal_plugin
需积分: 46 85 浏览量
2018-09-26
09:42:06
上传
评论
收藏 4.18MB PDF 举报


Mechanical Simulation Technical Memo
755 Phoenix Drive, Ann Arbor MI, 48108, USA
Phone: 734 668-2930 • Fax: 734 668-2877 • Email: info@carsim.com carsim.com
1 / 17 Updated: August 9, 2018
Unreal Engine CarSim Plugin Tutorial
Before You Start ..................................................................................................... 1
How to Setup the CarSim Plugin............................................................................ 1
How to Attach Objects to the Simulation ............................................................... 3
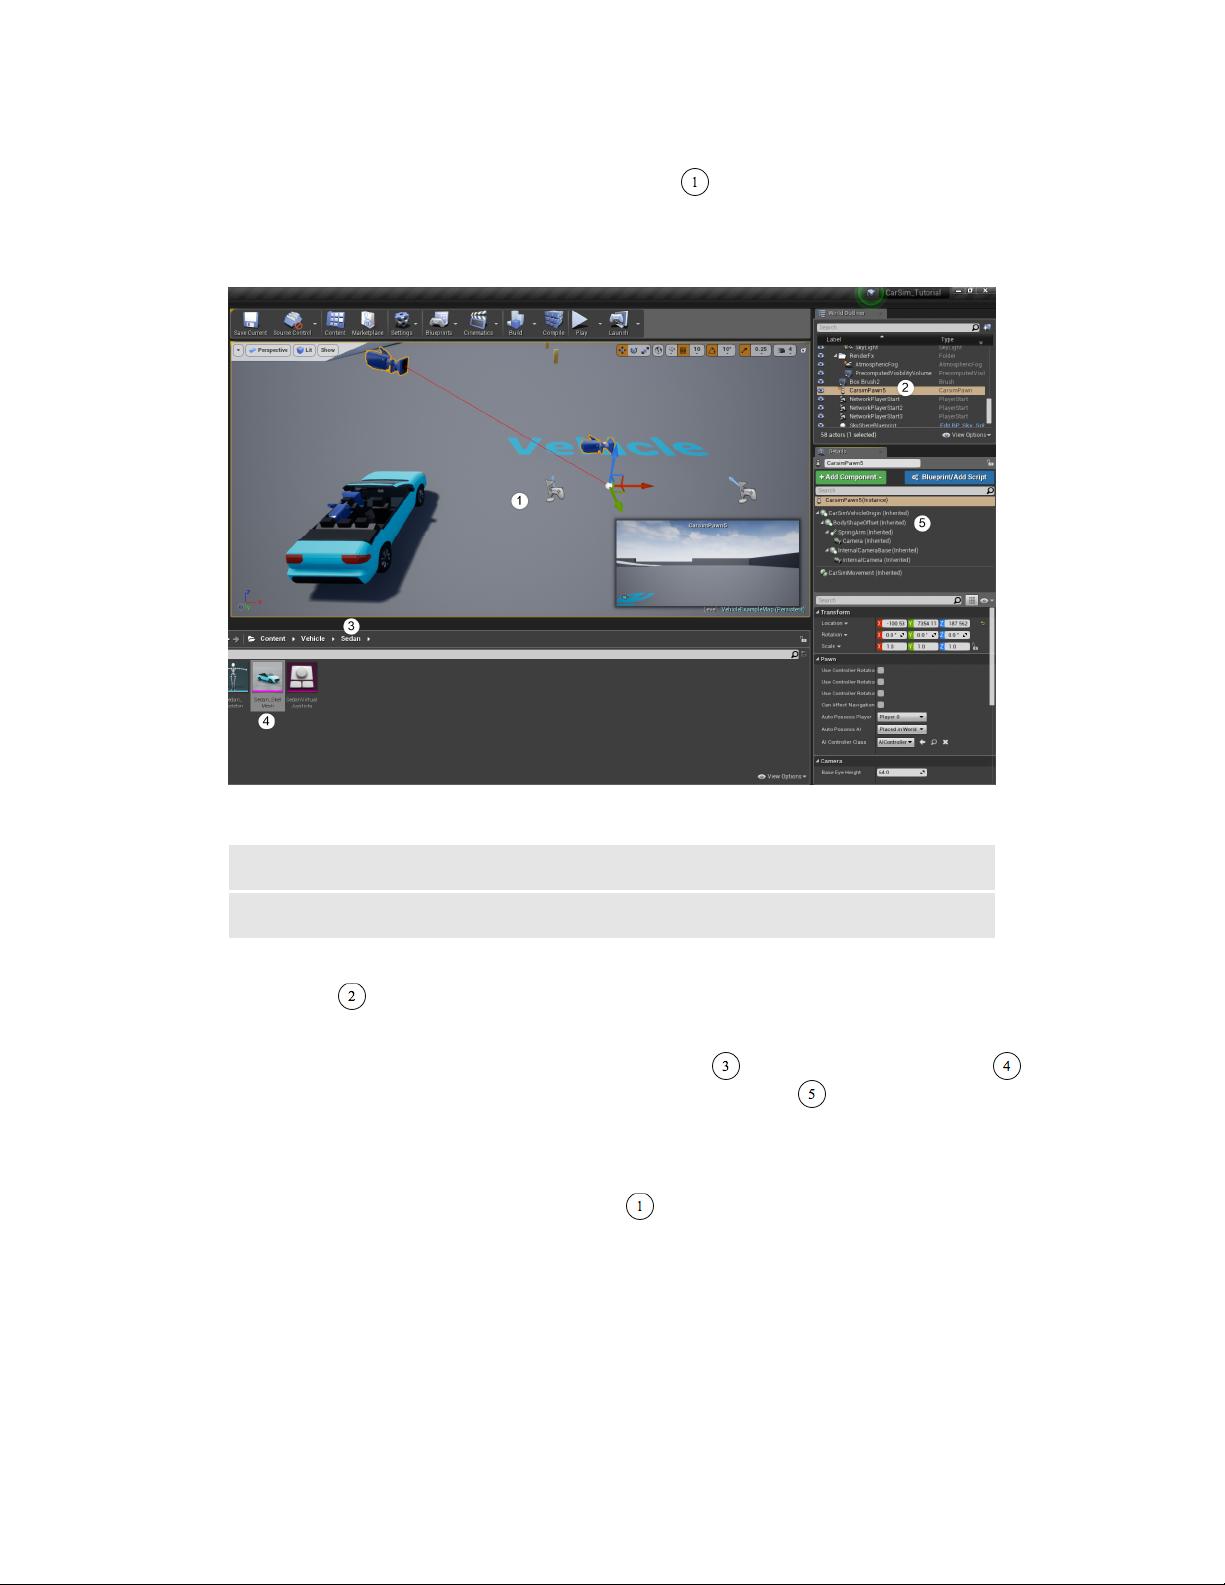
Loading an Example Project .................................................................................. 5
Creating a Vehicle Model in CarSim ..................................................................... 8
Changing CarSim Vehicle Parameters ................................................................. 11
Selecting a Vehicle with a different type of Suspension ...................................... 13
Input and Configuration Settings of the Unreal CarSim Plugin ........................... 14
Changing the Coefficient of Road Friction .......................................................... 16
The Unreal Engine is a powerful gaming engine which has the capacity to provide high-quality
graphics when used as a plugin. The Mechanical Simulation Unreal Engine CarSim plugin allows
users to create these high-quality graphics and overlay them on CarSim simulations. The plugin
will feed terrain data, including surface friction, from the Unreal Engine to the CarSim math
model. It will also provide the math model data to the simulation using code or blueprints.
Standard CarSim output files are generated so that you can view all of the selected variable
outputs in the CarSim plotter after a run. This tutorial assumes you have little or no experience
with the Unreal Engine, but would like to use the plugin for your vehicle simulations.
Before You Start
Before starting, there are a few requirements.
1. CarSim 2018.0 or later must be installed on your computer.
2. You must have a valid CarSim license. Ensure that either the main CarSim program or
the VLSM license utility is running with the CarSim Solver license feature enabled.
3. Create an Epic Games account to download the Unreal Engine.
4. Unreal Engine version 4.20 or later must be installed from www.unrealengine.com.
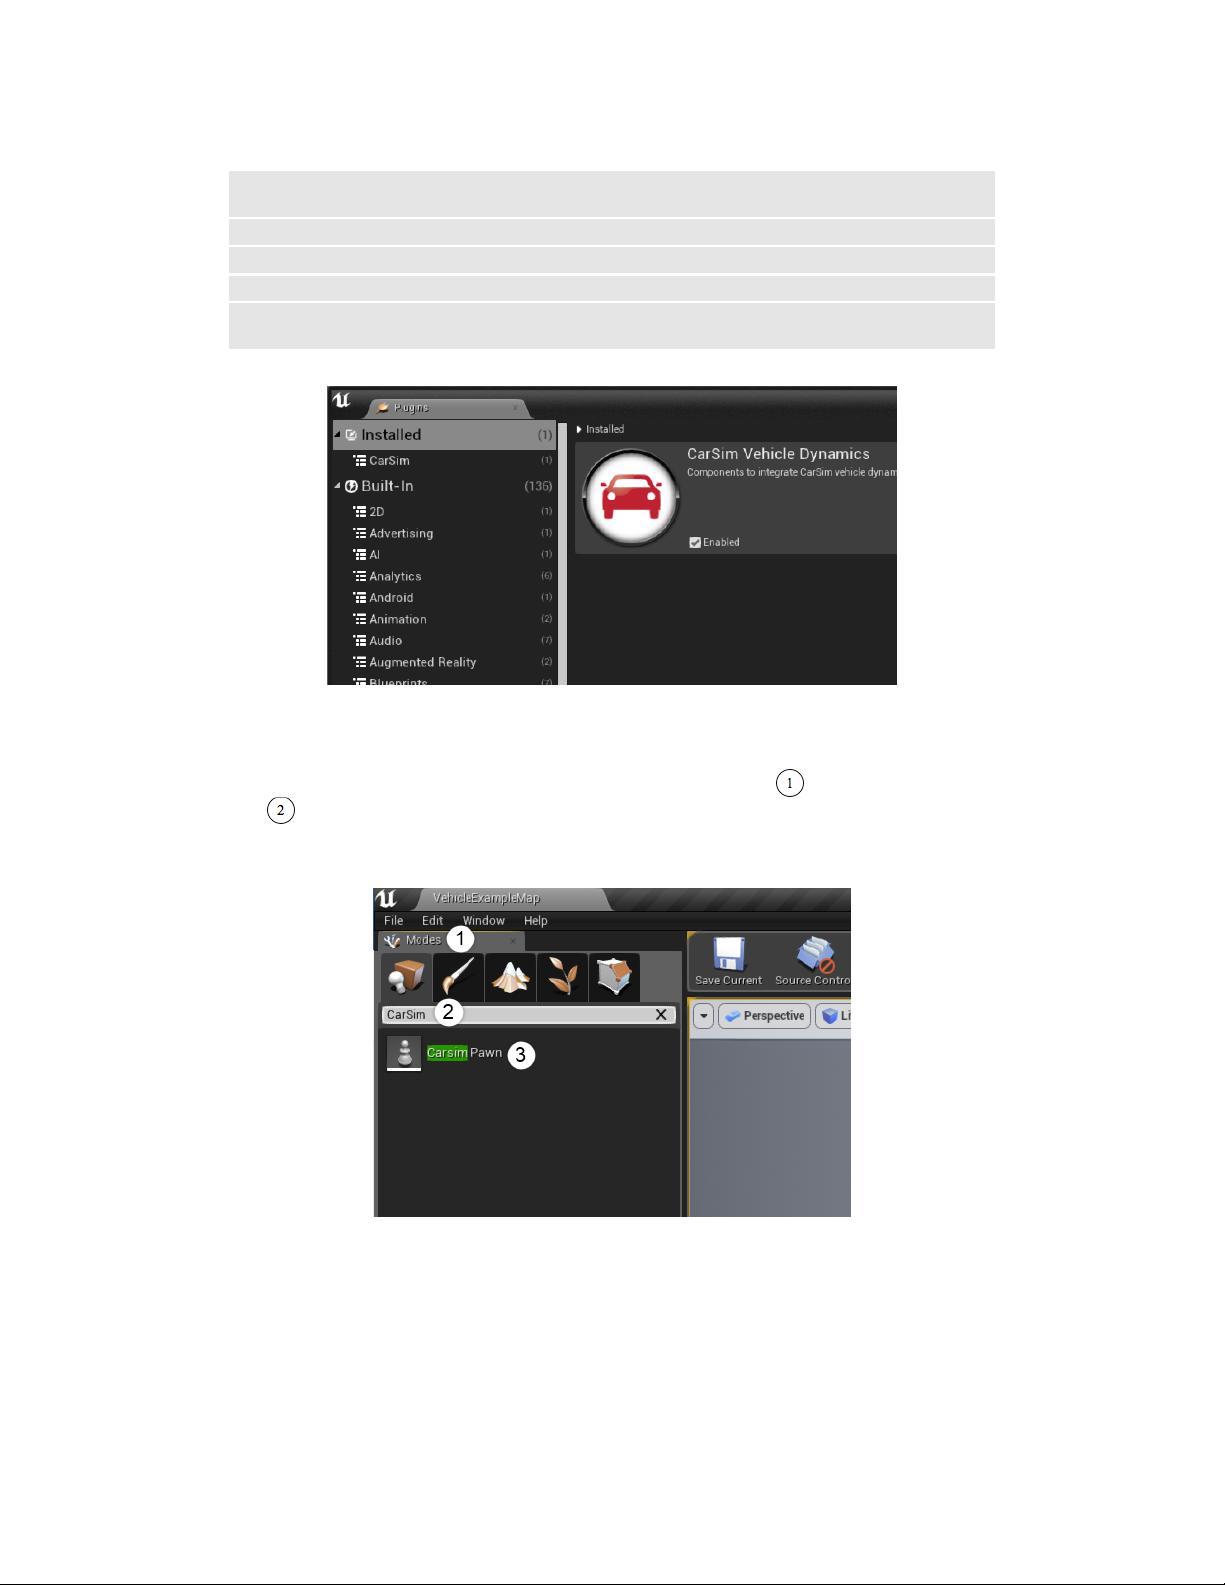
How to Setup the CarSim Plugin
Once you’ve downloaded and installed the Unreal Engine, open the Epic Game Launcher to
access the application. Go to Marketplace, and search for “CarSim” to find the plugin (Figure 1).
Click Install to Engine , then click the Launch button
to access the project browser.

剩余16页未读,继续阅读
资源评论


weixin_42007179
- 粉丝: 2
- 资源: 2


最新资源
- 最入门的爬虫代码 python.docx
- 爬虫零基础入门-爬取天气预报.pdf
- 最通俗易懂的 MongoDB 非结构化文档存储数据库教程.zip
- 以mongodb为数据库的订单物流小项目.zip
- 腾讯云-mongodb数据库, 项目部署.zip
- 腾讯 APIJSON 的 MongoDB 数据库插件.zip
- 理解非关系型数据库和关系型数据库的区别.zip
- 操作简单的Mongodb网页web管理工具,基于Spring Boot2.0支持mongodb集群.zip
- tms-mongodb-web,提供访问mongodb数据的REST API和可灵活扩展的mongodb web 客户端.zip
- SpringBoot整合mongodb学习MongoTemplate和MongoRepository两种方式CRUD使用.zip
资源上传下载、课程学习等过程中有任何疑问或建议,欢迎提出宝贵意见哦~我们会及时处理!
点击此处反馈


