


Openstack 云计算架构部署实验 v1.4
version Icehouse
Lion.Cui
声明
文档基本参照 openstack 官网、Ceph 官网结合自己部署撰写的
仅供学习
本人从事 Citrix 虚拟化相关工作
openstack 只是兴趣学习(求工作^_^)
此版本修正了一些步骤上的错漏,增加结合 cephx 身份认证
文档中如有不对的地方可以指正
转载请注明出处
__Doc.version__
版本
时间
说明
v1.0
2014/5/22
创建文档
v1.1
2014/5/27
基本完成文档
v1.2
2014/6/18
修正错漏, 添加拓扑图说明
v1.3
2014/7/3
修正错漏,增加虚拟机热迁移部分
v1.4
2014/11/7
修正顺序.增加 cephx 认证
www.eimhe.com
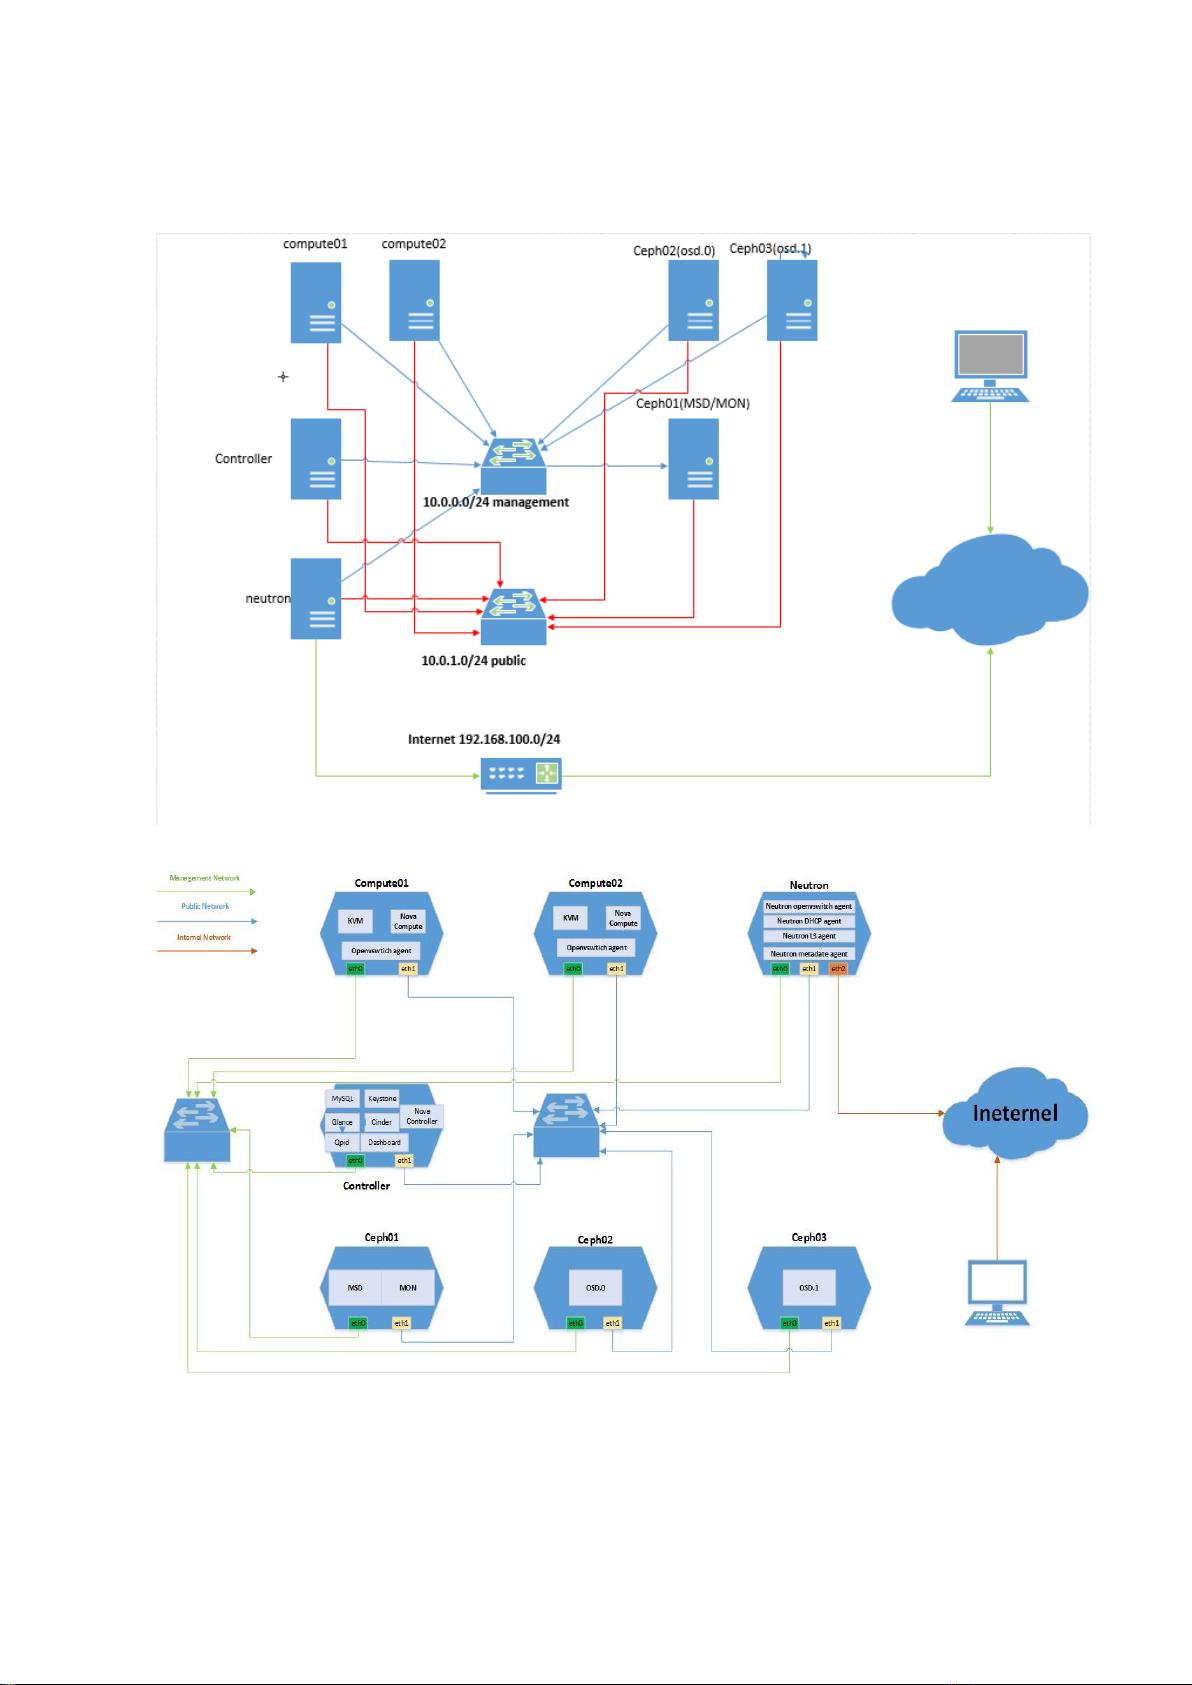
网络拓扑
IP 地址规划
Host name
Public (eth1)
Management (eth0)
Gateway(eth0)
Function
controller
10.0.1.11/24
10.0.0.11/24
10.0.0.2
Controller Node
neutron
10.0.1.21/24
10.0.0.21/24
Neutron Node
compute01
10.0.1.31/24
10.0.0.31/24
Compute Node
compute02
10.0.1.32/24
10.0.0.32/24
Compute Node
ceph01
10.0.1.41/24
10.0.0.41/24
MON/MDS Node
cehp02
10.0.1.42/24
10.0.0.42/24
OSD Node
cehp03
10.0.1.43/24
10.0.0.43/24
OSD Node
注意:neutron 服务器拥有三块网卡,第三块网卡无须配置 IP 地址
后端存储:统一使用 ceph,提供 rbd,cephfs,object storage
虚拟网络:GRE
基础操作系统:CentOS release 6.5 X86_64
Management:API 调用、虚拟网络 GRE 隧道、服务验证
Public:读取 CEPH 分布式存储
外网: 访问 instances
计算节点:相互免密码登陆、使用共享存储、实现相互迁移
主机基本配置
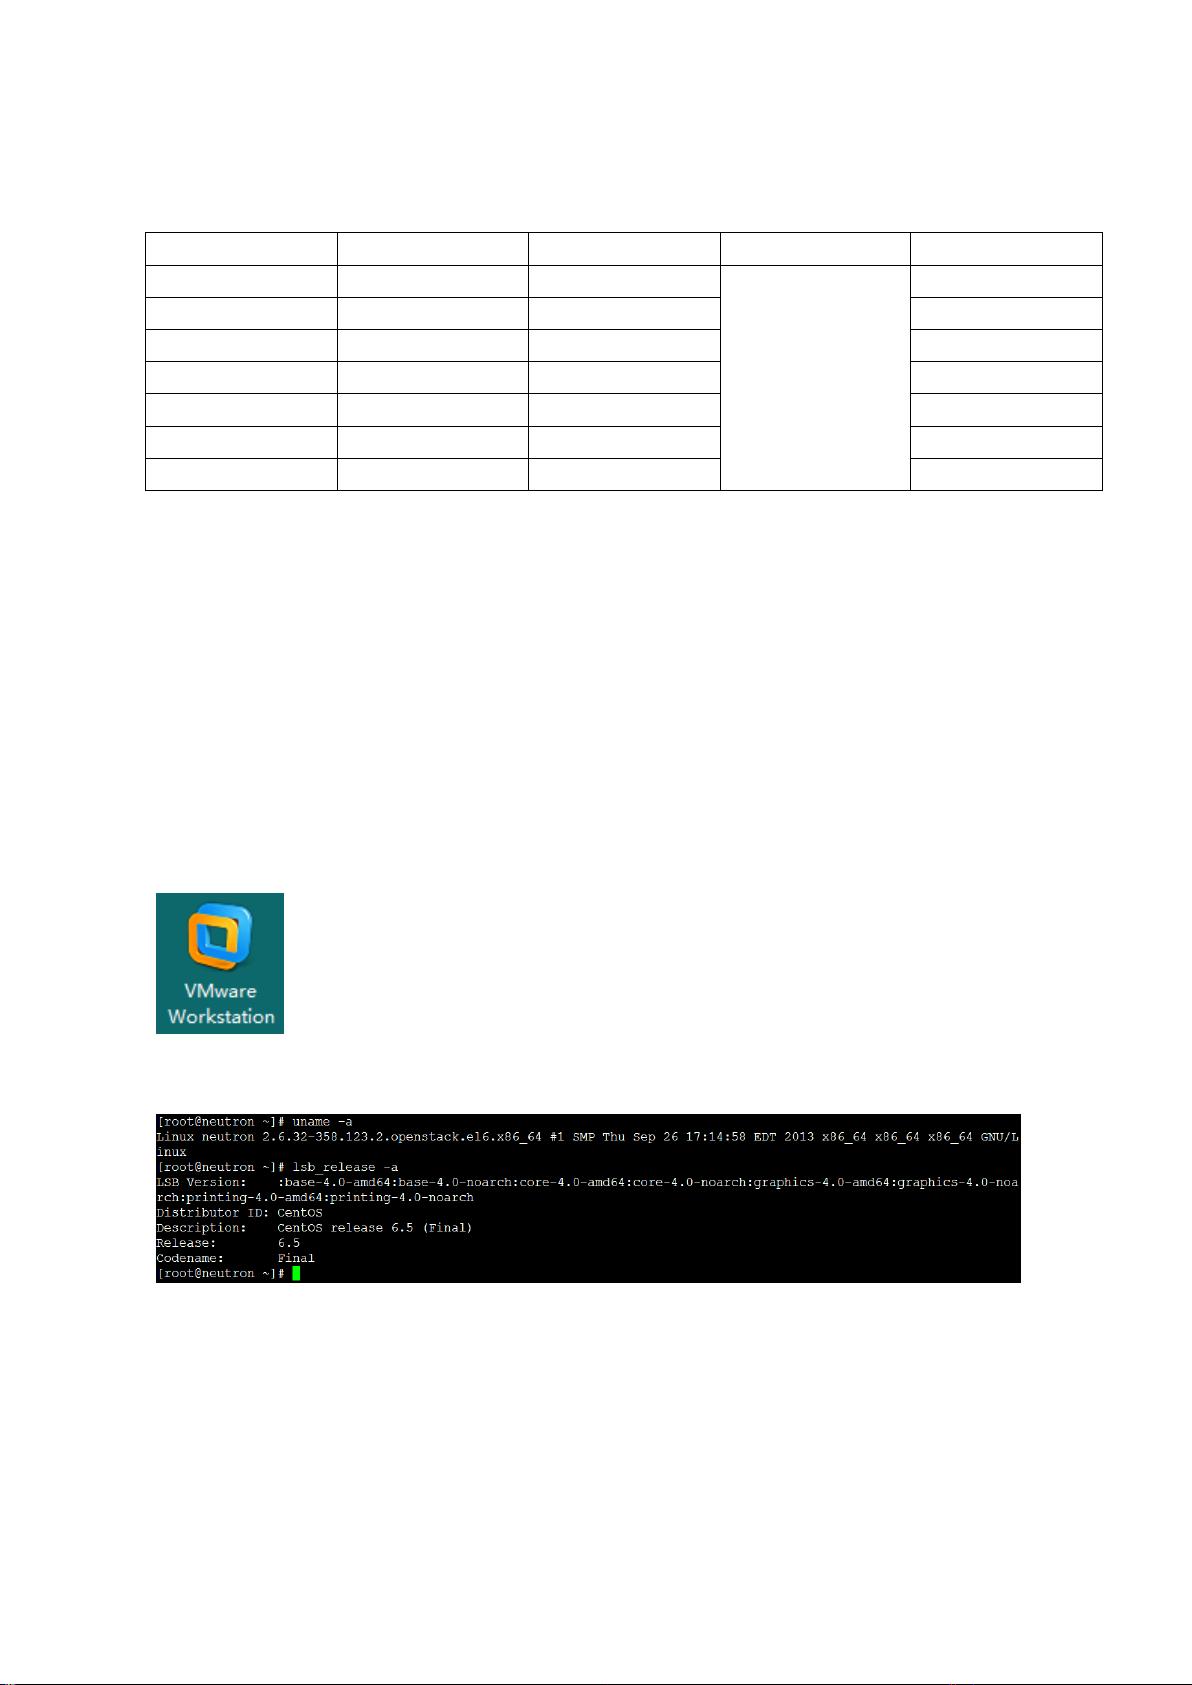
笔者所有的 Host 都是通过 VMware Workstation 虚拟的机器
版本信息如下
所有节点都是使用 CentOS6.5 x86_64 位操作系统
配置 Yum 源
//所有主机
# cd /etc/yum.repo.d/
# rm -f * #删除默认 yum 源

# yum install http://dl.fedoraproject.org/pub/epel/6/x86_64/epel-release-6-8.noarch.rpm #添加 epel 源
# vim /etc/yum.repo.d/ustc.repo #添加 USTC 源
[ustc]
name = ustc
baseurl = http://centos.ustc.edu.cn/centos/6.5/os/x86_64/
gpgcheck=0
enable=1
导入 RPM 包签名信息
[root@rhel]# rpm --import /etc/pki/rpm-gpg/RPM-GPG-KEY-CentOS-6
关闭 iptables 和 SELinux
[root@rhel]# vi ustc.repo
[root@rhel]# service iptables stop
[root@rhel]# chkconfig --level 35 iptables off
[root@rhel]# sed -i 's/enforcing/disabled/g' /etc/selinux/config
添加主机 hosts 解析
[root@rhel]# vim /etc/hosts #添加一下内容
10.0.0.11 controller
10.0.0.21 neutron
10.0.0.31 compute01
10.0.0.32 compute02
10.0.0.41 ceph01
10.0.0.42 ceph02
10.0.0.43 ceph03
配置 NTP 时间服务器
# yum install ntp -y
# sed -i 's/server0.rhel.pool.ntp.org/#server0.rhel.pool.ntp.org/g' /etc/ntp.conf
# sed -i 's/server1.rhel.pool.ntp.org/#server1.rhel.pool.ntp.org/g' /etc/ntp.conf
# sed -i 's/server2.rhel.pool.ntp.org/#server2.rhel.pool.ntp.org/g' /etc/ntp.conf
# sed -i 's/server3.rhel.pool.ntp.org/#server3.rhel.pool.ntp.org/g' /etc/ntp.conf
//controller host

# echo 'server 127.127.1.0' >> /etc/ntp.conf
# echo 'fudge 127.127.1.0 stratum 8' >> /etc/ntp.conf
# service ntpd start
# chkconfig ntpd on
//other host
# echo 'server controller' >> /etc/ntp.conf
# ntpdate controller ; hwclock -w
配置 Openstack Yum 源
//controller compute neutron host
# yum install yum-plugin-priorities -y
# yum install http://repos.fedorapeople.org/repos/openstack/openstack-icehouse/rdo-release-icehouse-3.noarch.rpm
# yum install openstack-utils -y
# yum install openstack-selinux -y
# yum upgrade -y
# init 6
部署配置 Ceph 存储节点
安装 ceph
自文档完结时,笔者已经使用更简单的 ceph-deploy 方式部署 ceph 集群,详细请参考另外一篇
<<Ceph 快速部署手册 v1.0>>,建议先熟悉手动部署
//ceph01 ceph02 ceph03
# yum install ceph -y
创建 Ceph cluster
//ceph01 host
获取一个 uuid
#uuidgen
a500528d-fc02-464e-b944-bddacbb5c3d1 #记住此 ID 号
编辑配置文件
#vi /etc/ceph/ceph.conf
[global]


- 1
- 2
前往页