


Qemu Manager 7.0 – User Manual – 4th April 2010
Table Of Contents
Chapter 1 - Introduction Page 2
Chapter 2 - New Virtual Machine
Wizard
Page 6
Chapter 3 - Hardware Tab Page 9
Chapter 4 - Drives Tab Page 21
Chapter 5 - Advanced Tab Page 29
Chapter 6 - Integrated QEMU
Console
Page 33
Chapter 7 - Updates Page 36
Chapter 8 - Configure Operating
System Defaults
Page 37
Chapter 9 - Configure QEMU Versions
Page 38
Chapter 10 - Misc Settings Page 40
This documentation has been generated for reference ONLY, I cannot be
held responsible for any incorrect data contained within it. All remarks
and comments and based completely on my own opinions and again may
be incorrect.
2
Chapter 1 – Introduction
Welcome to the QEMU Manager, this program has been designed to assist new
and existing users to operate the QEMU Processor Emulator
(http://fabrice.bellard.free.fr/qemu).
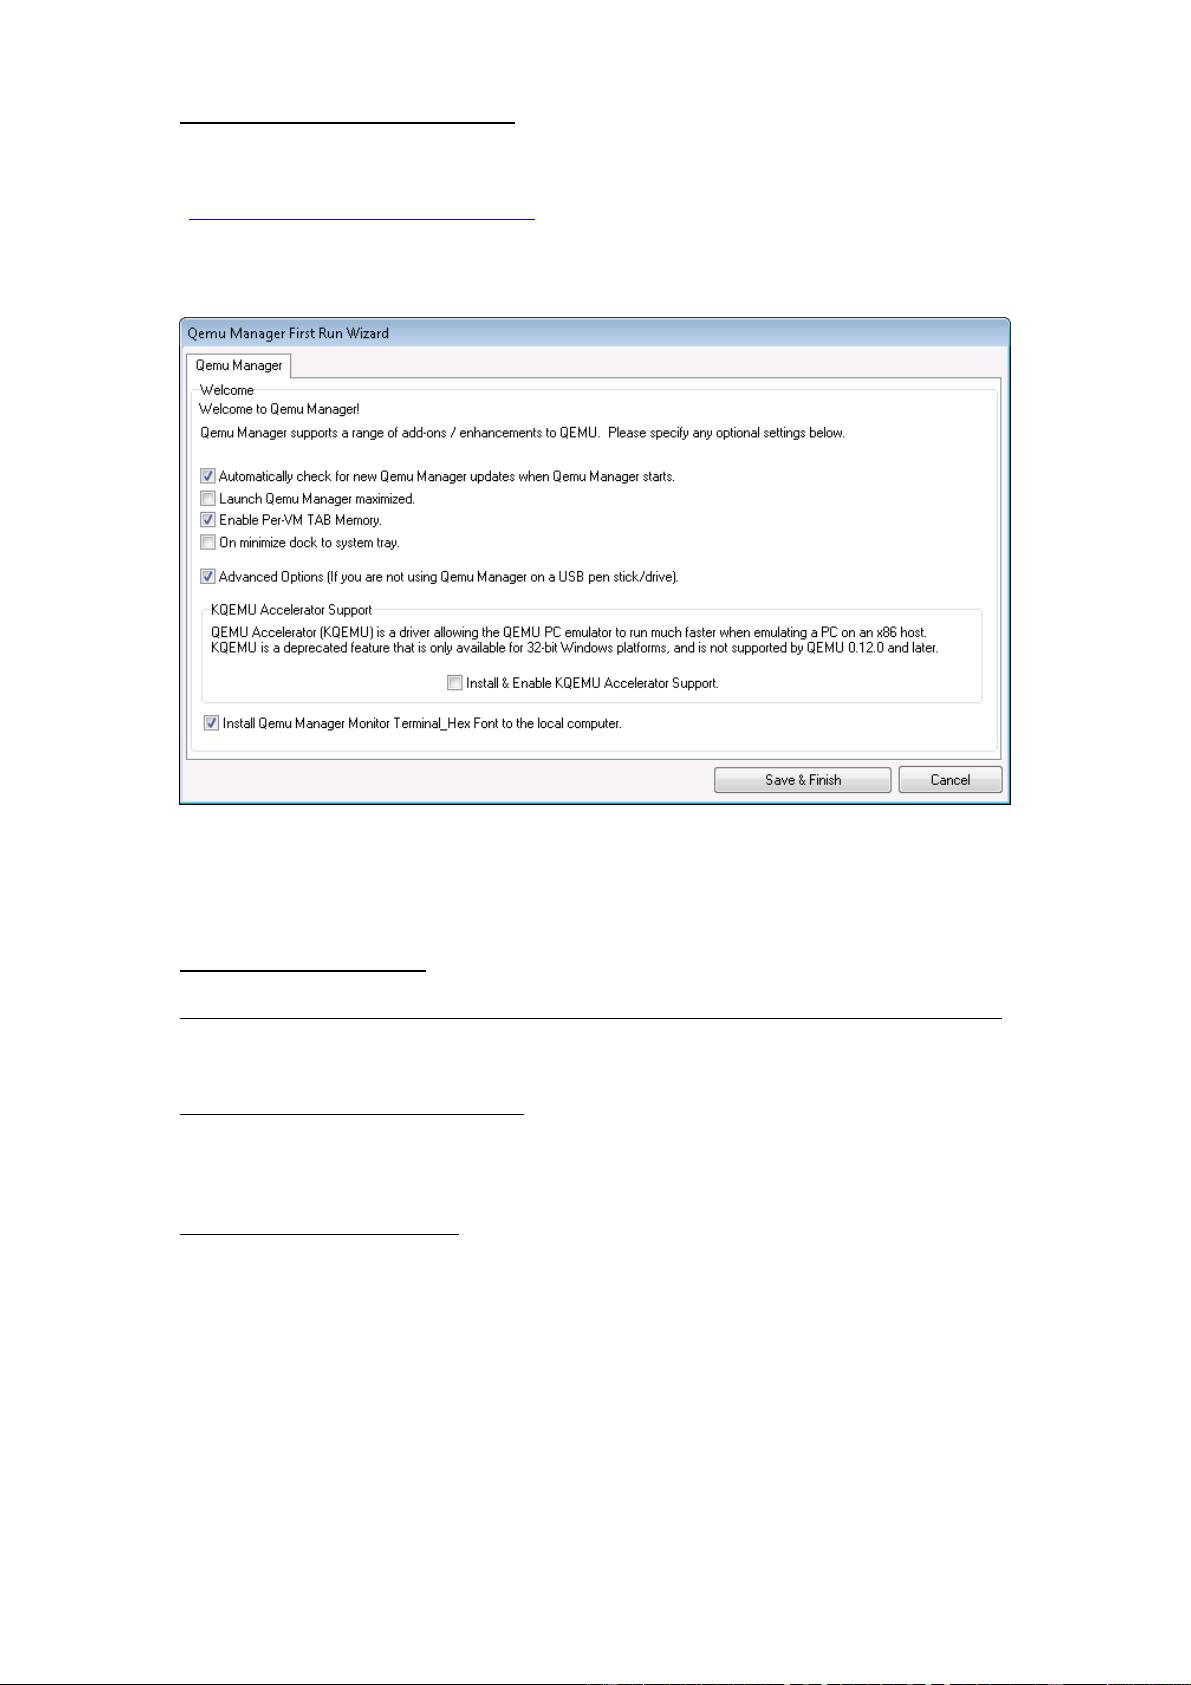
When you first run the Qemu Manager program you will be prompted with the
first run wizard.
The first run wizard allows you to specify specific options for Qemu Manager.
If you are not planning to use Qemu Manager on a portable USB Pen/Drive, you
can click the “Advanced Options” check box to view more options.
Description of options
Automatically check for new Qemu Manager Updates when Qemu Manager starts
This option will allow Qemu Manager to check for new updates when it’s started.
Launch Qemu Manager Maximized
Selecting this option will maximize the Qemu Manager window when the program
is started.
Enable Per-VM TAB Memory
Qemu Manager contains 5 Main Tabs at the top of the main window (Depending
on the options you have selected).
Qemu Manager can remember which tab you was last using before moving to
another virtual machine. If you require this option tick this box.

3
On Minimize Dock to System Tray
Selecting this option will place Qemu Manager on the system tray when you
minimize the main window.
KQEMU Accelerator Support
QEMU up to version 0.11x has support for the KQEMU accelerator driver. If you
wish to enable this click the “Install & Enable KQEMU accelerator support” check
box, and the KQEMU system driver will be installed.
Install Qemu Manager Monitor Terminal_Hex font to the local computer
This option will install the Qemu Manager QEMU Monitor font onto your computer;
this allows the monitor tab output to be more readable.
When you are happy with your initial selections, click the “Save & Finish” button.
If you do not wish to specify these options now click the “Cancel” button.
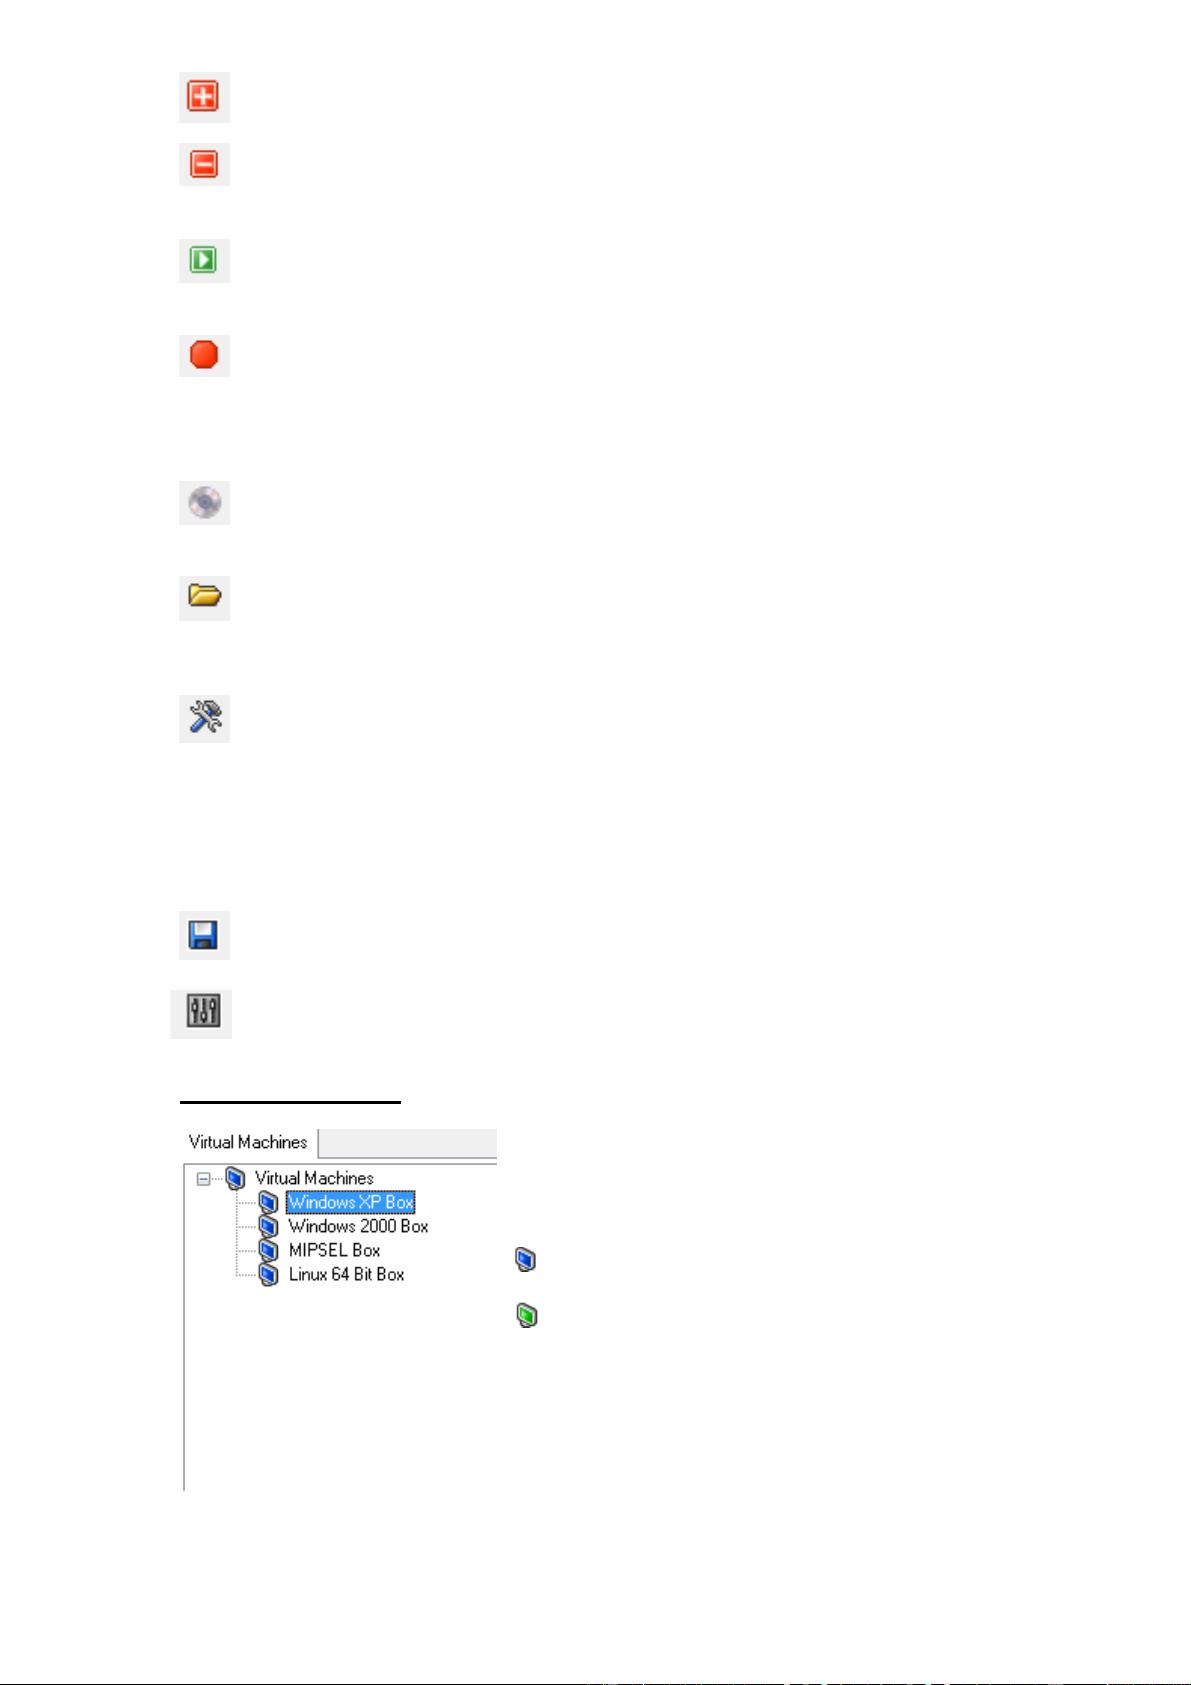
Main Qemu Manager Window
The main window is separated into 4 parts:
Main Menu
Here you can access configuration options, exit the program and get help on
the program.
Main Toolbar
Here you can control the program using shortcut buttons these consist of:
4
- Create new virtual machine. This button allows you to creat a new virtual
machine that can be launched with Qemu. (See Chapter 2)
- Delete a virtual machine. This button allows you to delete a created
virtual machine.
- Run a virtual Machine. This button will allow you to launch a virtual
machine. Simply click on the virtual machine you wish to run from the list
below the toolbar.
- Terminate a virtual machine. This button will show a list of running
virtual machines. You can select a virtual machine to terminate should it
become unstable or cannot be terminated the correct way. (You should only use
this function as a last resort as it may result is some data loss).
- Import Media – This button allows you to import media to use with Qemu,
I.E. CD-ROM Disks & Floppy Disks. The Wizard will assist in creating image
files to use with Qemu. (See Chapter 4)
- Manage VM Stores. VM Stores are folders on your hard disk which
contains the Virtual Machine configuration files & disk images. Qemu
Manager knows where to find these by looking within the VM Stores. You can
create/edit/delete VM Stores using this button.
- Add/Remove Hardware. There are specific types of hardware that can
be added/removed from your virtual machine - These are:
• Network Cards
• Serial Ports
• Parallel Ports
You can add and remove these by clicking this button or by right clicking
within the “Hardware” list view.
- QEMU Version control. You can use multiple editions of QEMU with
Qemu Manager, you can configure these by clicking this button.
- Qemu Manager Options. You can configure specific Qemu Manager
options by clicking this button.
Virtual Machine List
The virtual machine list, located of the left hand
side of the Qemu Manager lists all your created
virtual machines. Beside each virtual machine is
a blue or green icon.
- Indicates the virtual machine is not running.
- Indicates a virtual machine is running.
To Manage a virtual machine simply click once
on the virtual machines name.

5
Main Configuration Window
To modify an option simply Double Click on that option.
The main configuration window consists of 3 tabs:
Hardware – All hardware related items for your virtual machine.
Drives – All hard disk items, removable media & snapshots related to your virtual
machine.
Advanced – Advanced configuration options for your virtual machine.
Console – If you run QEMU integrated with Qemu Manager, the output of QEMU
will be displayed in this tab.
Monitor - If you run QEMU integrated with Qemu Manager, the monitor control is
accessible by this tab.


- 1
- 2
- 3
- 4
- 5
- 6
前往页